A One Take Performance Video Using Astera Tubes and Litegear Units
Have another blog post installment for everyone. This time around we have DP Josh Pausanos and this pretty insane one take music video he put together using some of the RGB LED fixtures from our arsenal. Here’s his breakdown.
I had the pleasure of working with director Hong Kim last year for a one take performance video with his frequent musical collaborator, Chris Clouse. The Chris Clouse Project is a multi-instrumental DJ-hybrid music group featuring multiple players and live remixing. Hong and Chris put together a one take performance video previously that was able to show off the many talents of Chris and his crew, however it was mostly naturally lit and this time we wanted to the look of their new track to be more explosive. The solution? Shoot at night using a bunch of color, light movement, and camera movement!
Style
We set out to make this video full of energy, moving to the rising and falling of the song like you were dancing along to the performance with them. Hong had a warehouse space in mind where we could stage the band’s performance and with the help of our fellow friend and steadicam operator, Koon Ya-Inta (Steadikoon), we were able to move the camera constantly, following different musicians for different sections of the song. Using this camera movement and blocking as a creative basis we forwarded the same thinking into our lighting plan. Here were some of our references for lighting:
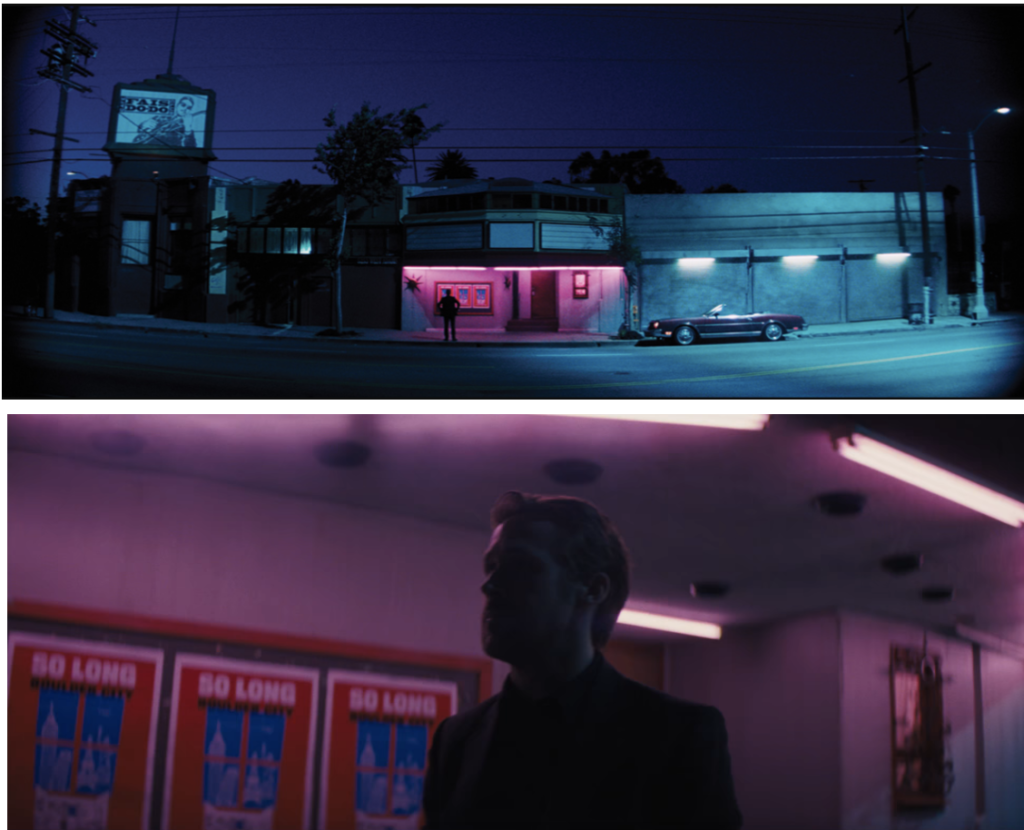
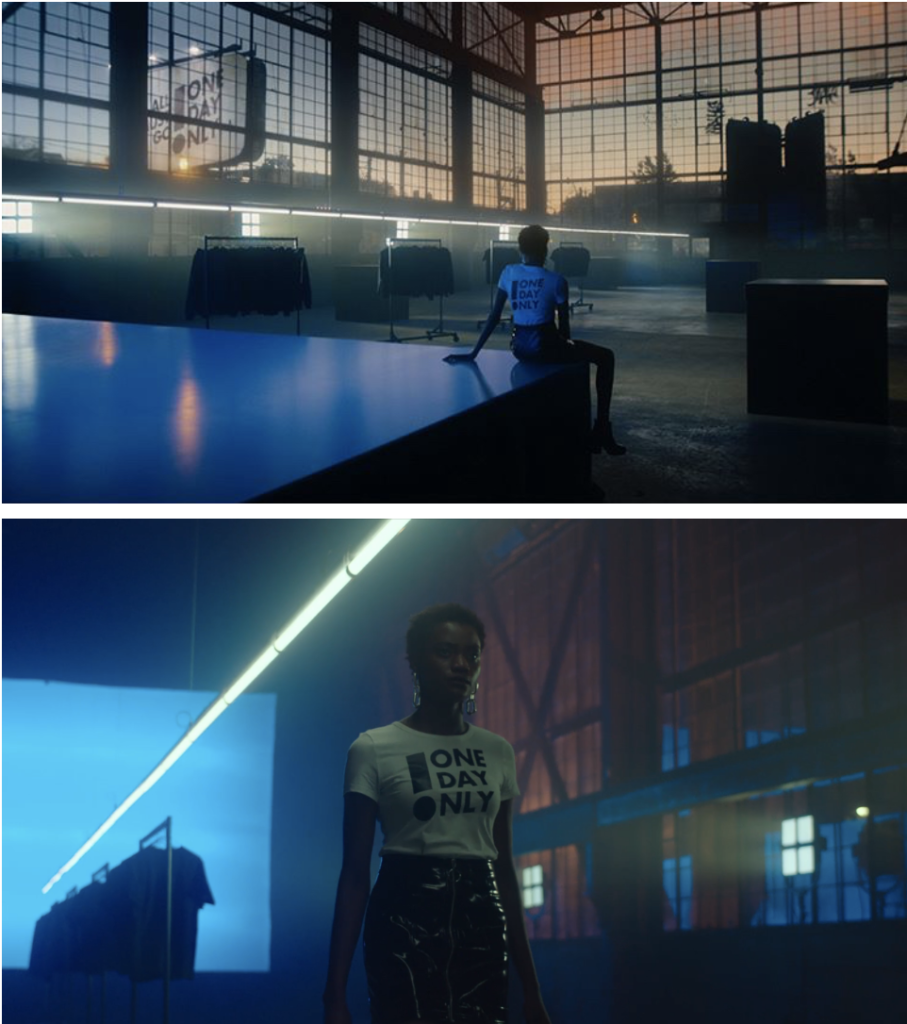
Okay, okay… as you can see our references featured a lot of “tubes in the frame” which has now become a very boring fad that has been beaten dead by many lazy music videos. HOWEVER, we decided we wanted to lean heavily on the RGB tubes not only because they would look cool as a part of the warehouse look we were going for, but also because of their effects capabilities. They served as another element of movement that could play into the song and the performance. It wasn’t a lazy decision, it was a practical one!
Research, Scouting, and Planning
Luckily, at that point last March, I had used the Astera AX-1 tubes once and found them to be super helpful for this sort of thing. Battery powered, RGB, lots of effects, and even though one tube wasn’t super powerful they came in an 8-pack. I found them worth playing with! Additionally, I had also been seeing a lot of different RGB Litegear units like LiteStix or homemade fixtures using RGB LiteRibbon that I felt could also add some interest in the frame. Focusing on these specific units made it clearer to see how we could make use of the space on our scout. Here is an idea of how we blocked out the performance after seeing the space, it looks a little complicated but it made sense to us!:
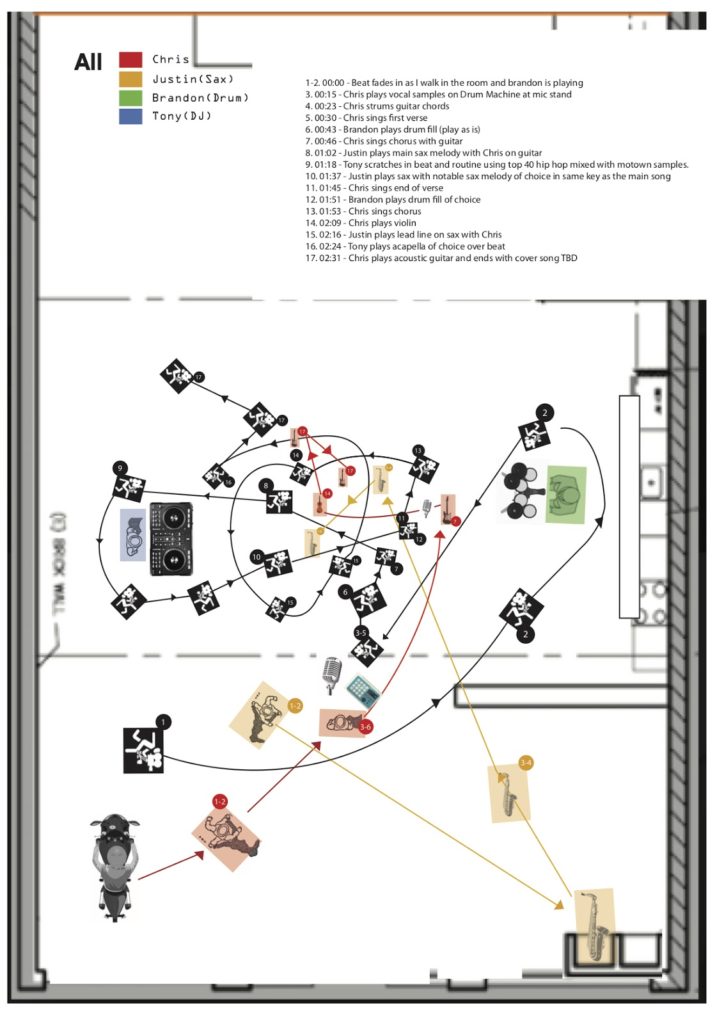
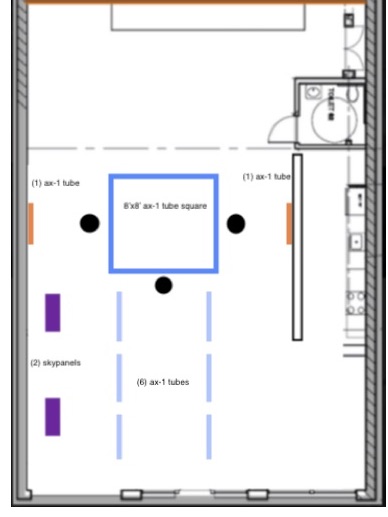
And here are some rough lighting diagrams we put together after we figured out the blocking of the performance, some things changed from these diagrams but here is the general idea:
From these initial notes my Gaffer, Anders Ericsson, and Key Grip, Nicholas Yee were able to modify and tweak a few things and we came up with a plan:
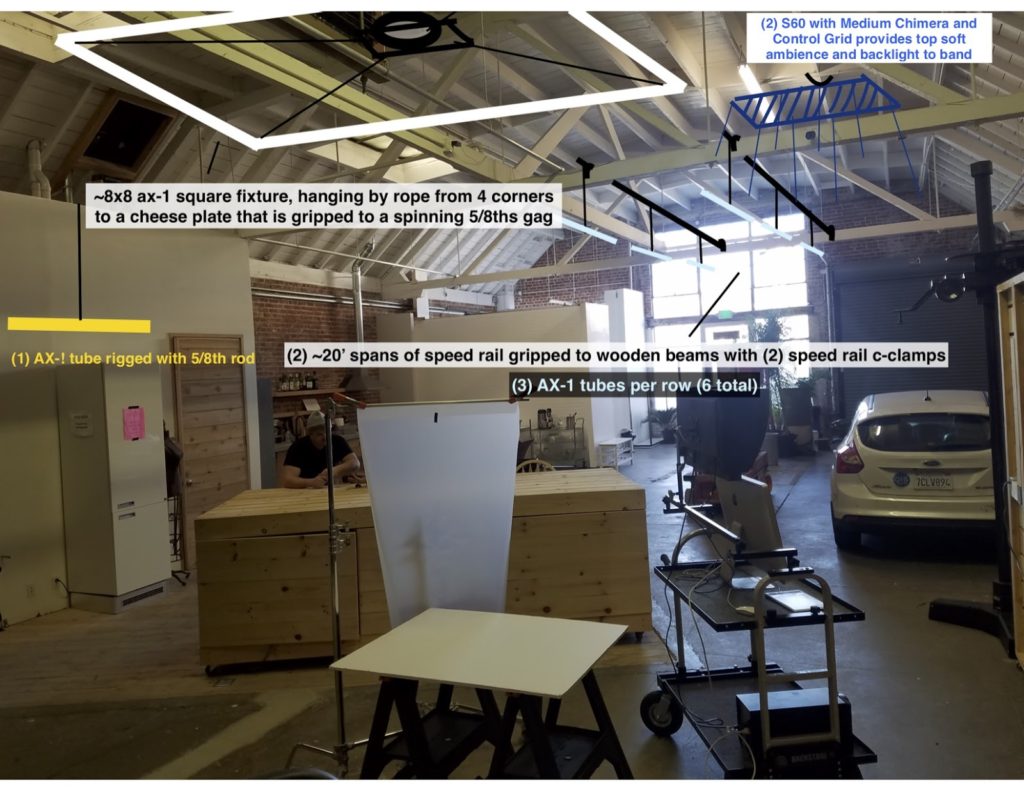
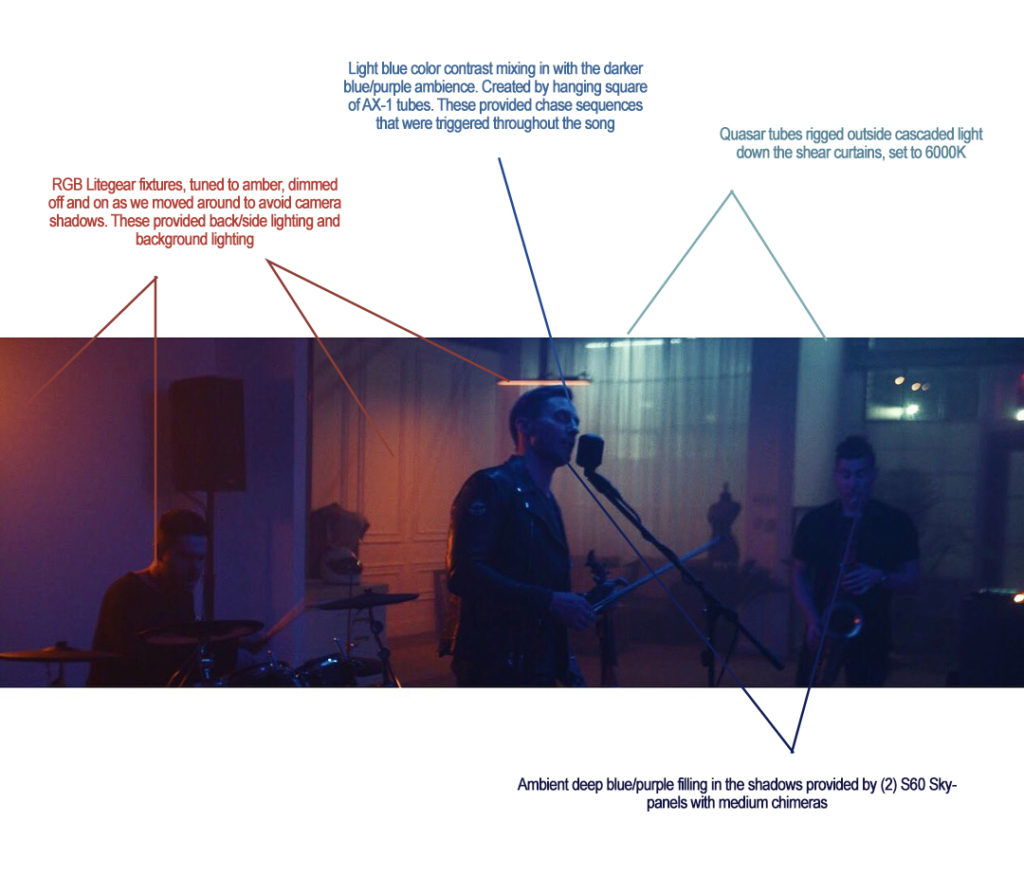
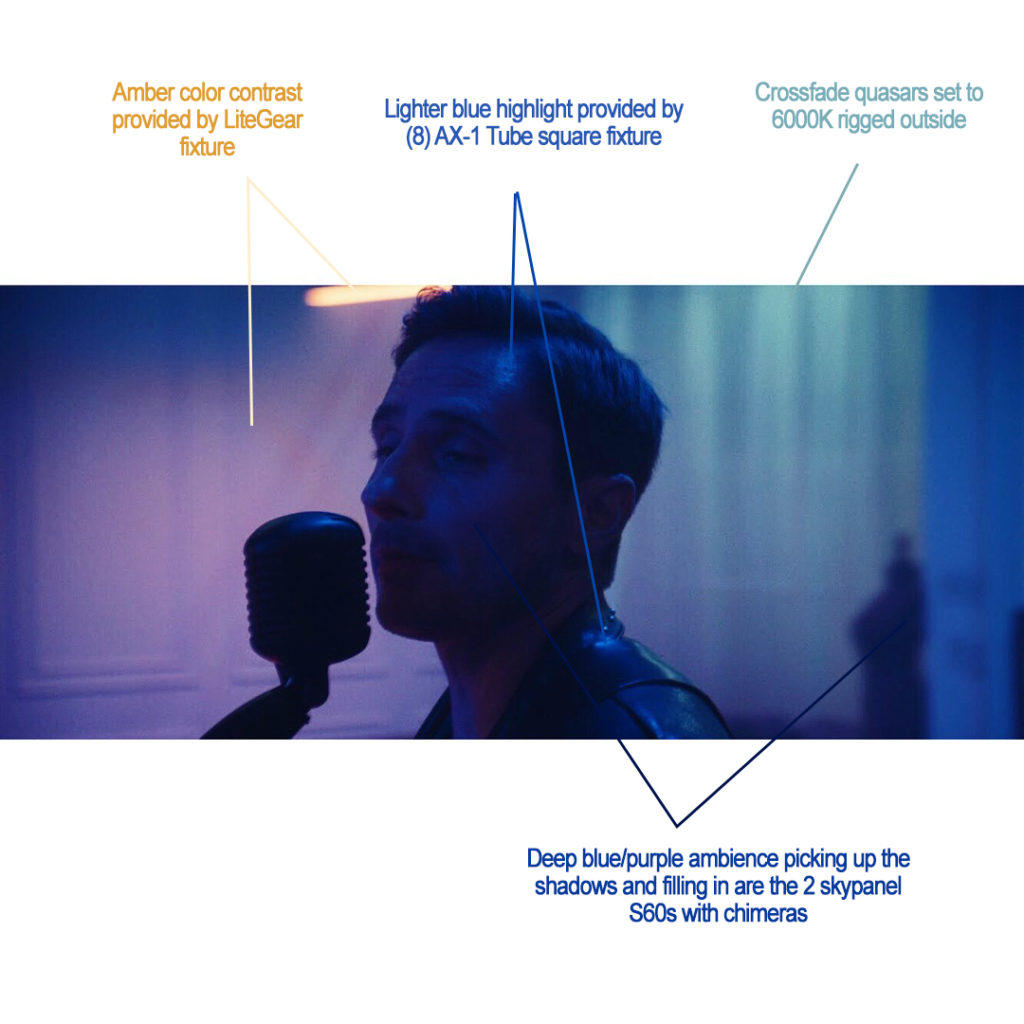
- For an overall soft, toppy ambience we used (2) Skypanel S60s with Medium Chimeras evenly distributed throughout the space tuned to a deep blue/purple so that the shadows would have some color in them
- To add some color contrast in frame against the deeper blue/purple we hung two rows of (8) AX-1 tubes. We had those set at a lighter shade of blue, close to white. These rows of tubes helped to pick up some of the highlights on instruments and on their faces. They also provided a cool opportunity to play with a tunnel effect sending colors down the rows.
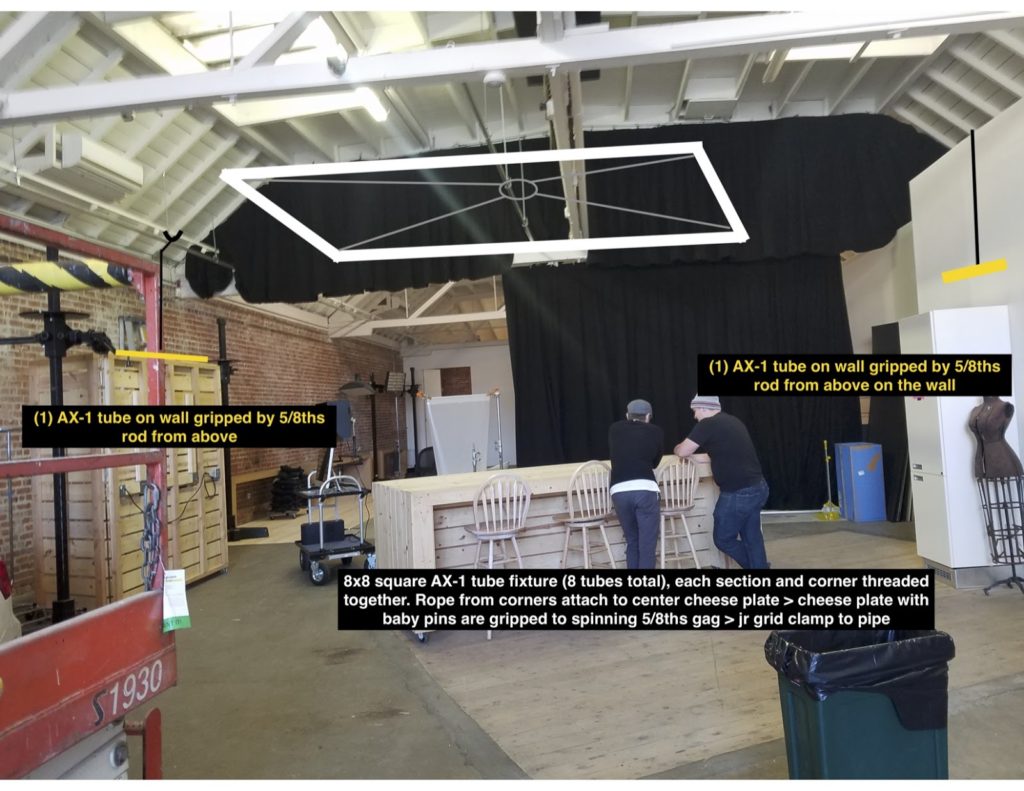
- As a closer, more direct, source we hung a square LED tube fixture in frame above the main staging of the band made out of (8) AX-1 tubes. This fixture allowed us to play with chase/flash effects closer to the band. They were also set to a light blue/white until they were changed to blue/pink during the chorus
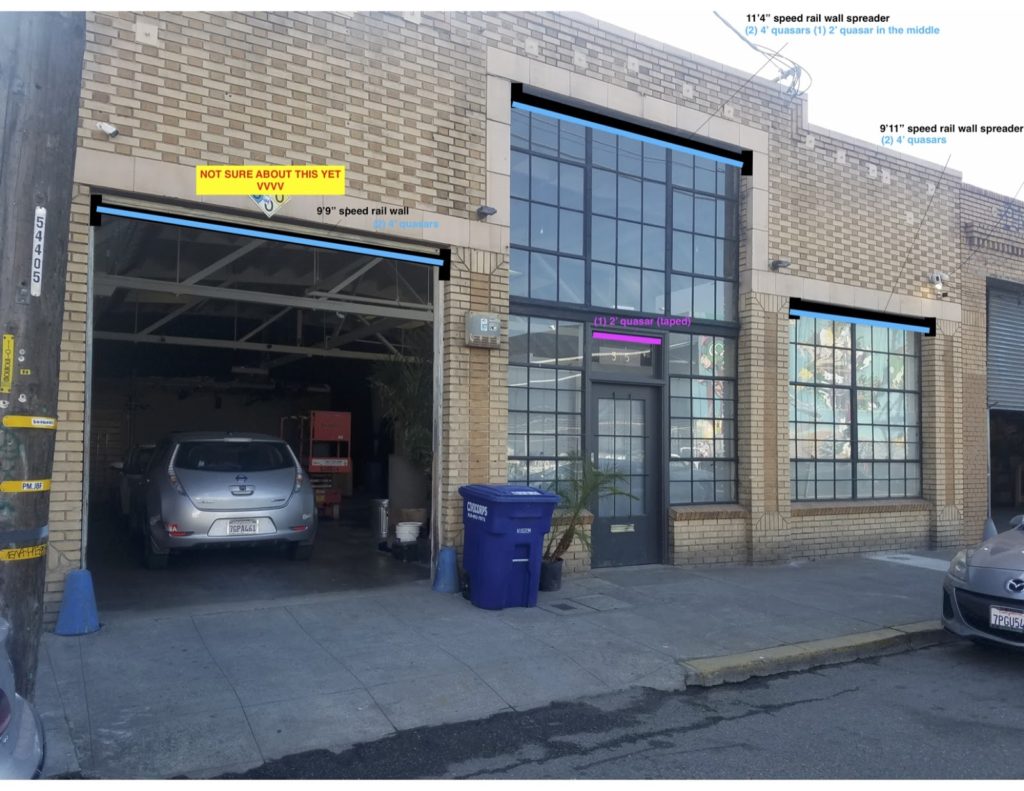
- Outside of the large warehouse windows we rigged crossfade quasar tubes that lit up the texture of the windows as well as the shear curtains we dressed the set with. Most were tuned to 6000K except for one small tube we gelled red above the door. This allowed the band members to be separated from the background more
- In another attempt to separate people from the dark background we chose a couple of spots to install homemade, one meter long, RGB LiteRibbon fixtures (courtesy of Drew Nelson) which also served as amber highlights in the background as well as back/sidelights
- Lastly we thought it would be cool to place some small, battery-powered LiteStix on the DJ consoles to augment the existing lights from their devices, we gelled those to a deeper red/amber
- To control everything we planned on DMX’ing everything to an Ipad using Luminair. We hardwired everything to mitigate any lag in response time, this way we would cue certain lighting changes with the song while maintaining our color palette of blues, purples, pinks and amber.
Gear List
We were very thankful to have some friends help us out with sourcing our camera package. In addition, Bolt Lighting was able to hook us up with a great deal for most of our lighting and grip package, their 3-ton especially came in handy for rigging all of our lights from above. Here’s what we ended up with.
Camera
Red Scarlet-W
Cooke Varotal 20-100mm T3
Low Con filtration
Lighting & Grip
(2) 8-pack Astera AX-1 tubes
(2) Skypanel S60s w/ medium chimeras
(1) LED LiteGear Cart (courtesy of Drew Nelson)
- Assortment of LiteRibbon and LiteStix housings small and large
- LitegearDMX Dimmer packs
(4) 4’ crossfade quasar tube
(2) 2’ crossfade quasar tube
(1) Luminaire Ipad kit
(1) DMX Optisplitter
(1) Crate of DMX cable
(1) 3-ton grip truck
Problems
Though it seemed like we had the necessary tools to play with, there were still a few hurdles to jump to make it all happen:
Can we make this all happen in one day?
Unfortunately, being a low budget shoot, we only had one day to work with. If you take a look at the space and diagrams it have seemed impossible to pull off a whole pre-rig, shoot and tear-down in one day. The solution to that was a bunch of pre-vis diagramming as you can see below:
Also another solution was begging our talented friends to join the effort! We had the A-Team on camera to keep things quick and efficient:
Steadicam Op: Koon Ya-Inta
1st AC: Luke Lasley
2nd AC: Shannon Bringham
Cam Utility/Data: Ashley Valenzuela
We also had a killer G&E Team:
Gaffer: Anders Ericsson
BBE: Keith Cheng
Key Grip: Nicholas Yee
BBG: Connor Benson
Funny enough, each of the G&E members above also deserve “board op” credits which is explained in my next problem:
Can we really control everything using one Ipad?
With the right amount of testing time or with enough money, we could have probably made it through the process of addressing and controlling all 24 lights into luminair or a full lighting console. Unfortunately, we just couldn’t make that happen with this production, instead we had one prep day to figure it out.
Luckily, Bolt opened their shop doors for us to test and our good friend Clay Kerri also stopped to help address the LiteGear units into Luminair. The rest of the lights were easier to get working, but we quickly found that the communication between the AX-1 tube’s many effects wasn’t as friendly with Luminair than it was with its own app and controller. So, we decided that we would basically have 3 board ops sequencing and dimming lights live during the one take: 2 operators on separate Samsung tablets between (16) AX-1 tubes to give us more control of lighting effects and 1 operator handling the LiteGear units and the Skypanels separately. Phew! Not the most ideal set up, but I think it was fun! just look at their faces:
To help them coordinate the lighting changes with each other I quickly made this spreadsheet the night before. This helped breakdown which lights would change and when. We set up a separate monitor for them and I was able to give them cues or make quick changes via walkie during the take or in between takes.

Enough exposure?
After we lit the space we rehearsed the move a couple of times and tweaked as the sun went down. Once it was dark I metered everything at 800ASA, however, because we were using more saturated colors I had to push the camera to 1600ASA to get enough light for our T3 zoom lens.
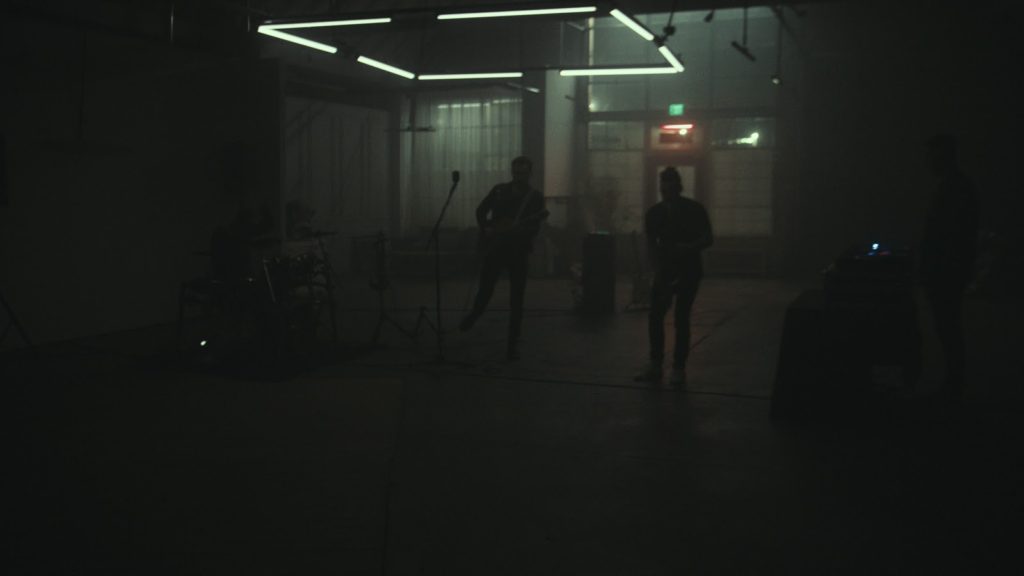
Here is a photo and video showing the end result of our set up right before we started shooting:
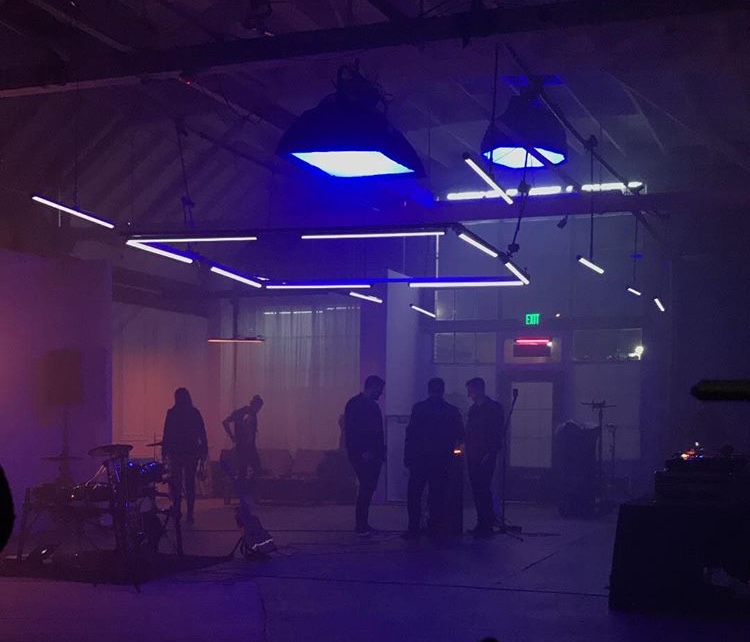
Check out the final video here:
Lighting Breakdown
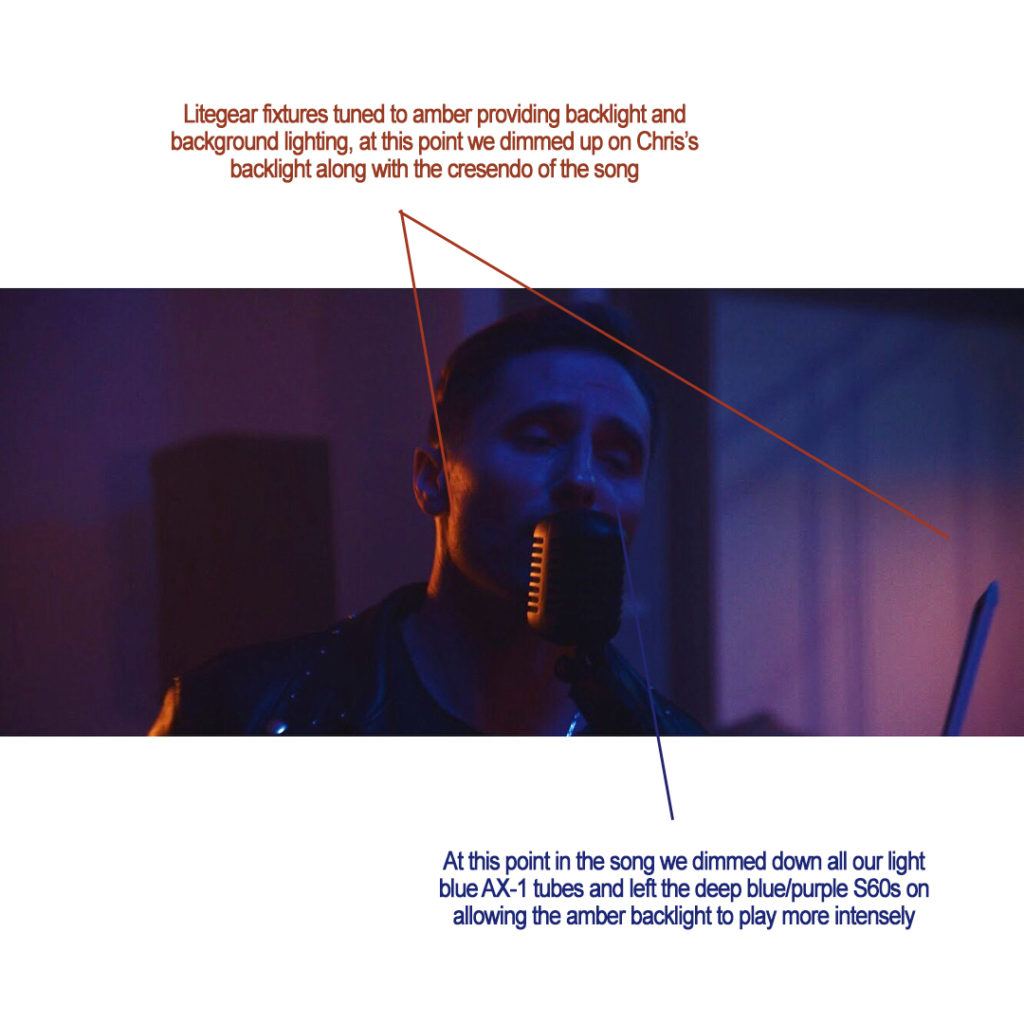
As the song fades out in the last few seconds we also faded and turned off lights by each section, leaving the square AX-1 tube fixture illuminated and the quasars rigged outside onto silhouette the band.
Lessons Learned
Finally, after 8 takes we felt like we had a solid 3 takes that we could choose from. Thanks to our solid team we accomplished everything in one long night! I think it turned out really well given the circumstances, but here are a few things I took away from the experience:
- One of the biggest walkaways from this job was the learning curve of running a full RGB LED arsenal on DMX. It’s fun and worth it only IF you have the time and proper gear to figure it all out. If we had more money and time I think I would have gone down the route of getting a larger, smarter lighting console to synchronize all the light cues to the music without having to have 3 separate board ops DJ’ing the lights to the music live.
- I also wish we had more light output in order to rate the camera at 800ASA with a little exposure to spare. I think a few more Skypanels could have done some good. Or using less saturated of colors on the lights might have gained back a stop of light and the color is something we could have enhanced in post.
- As you can see in the video some of the changing light effects get a little muddled with each other. Its hard to really see the light tunnel effect we were going for. I think there are few things we could have done different to achieve that:
1) Less haze – I think the haze muddled all the colors together too much but it did bring a lot of life to the image
2) More light control might have helped direct the light more. I think we should have put control grids on all the lights we could have or maybe even used harder sources rather than soft washes. This would have added more directionality and therefore each light effect would have been more pronounced and not lost in everything else.
3) I wish we had lowered the rows of tubes and also angled up more with the camera at times in order to actually see the light effects on the tubes in frame more.
Conclusion
Overall, I’m really grateful to have had the opportunity to have such a great team and all the gear to play with. This project really allowed me to become an even more comfortable with Asteras and with LiteGear stuff. I’m definitely a big fan of what these LED lights can do and look forward to using them again in the future, but don’t worry I swear I won’t put another tube in frame….. Unless there is a real practical reason! 🙂
Artist:
Chris Clouse
Director/Producer:
Hong Kim
DP:
Joshua Pausanos
Bolt Lighting Rental Inc is a lighting rental house located in the San Francisco Bay Area. We’re committed to training the next generation of technicians everywhere. Check out our instagram for daily educational content.