Building out our Custom 1 Ton Sprinter Grip Truck
Have been working hard at building out a new grip truck here at Bolt Lighting Rental and we thought we could make this blog post to let you into the process a little bit and see how we go about designing our shelving in the vans and trucks. We recently purchased a 2500 Dodge Sprinter to compliment the 3500 Mercedes Sprinter that we already own. The 3500 is a fantastic truck, but the cost to build it out was pretty staggering. The goal with the 2500 Sprinter was to create something that was just as versatile for small productions, but at a much more reasonable price tag.
The 3500 Sprinter has a Studio Carts EZ Duz-all, Rolling Flag Box, and a Mini 4×4 Cart. We also have the backstage Mini Muscle Cart.
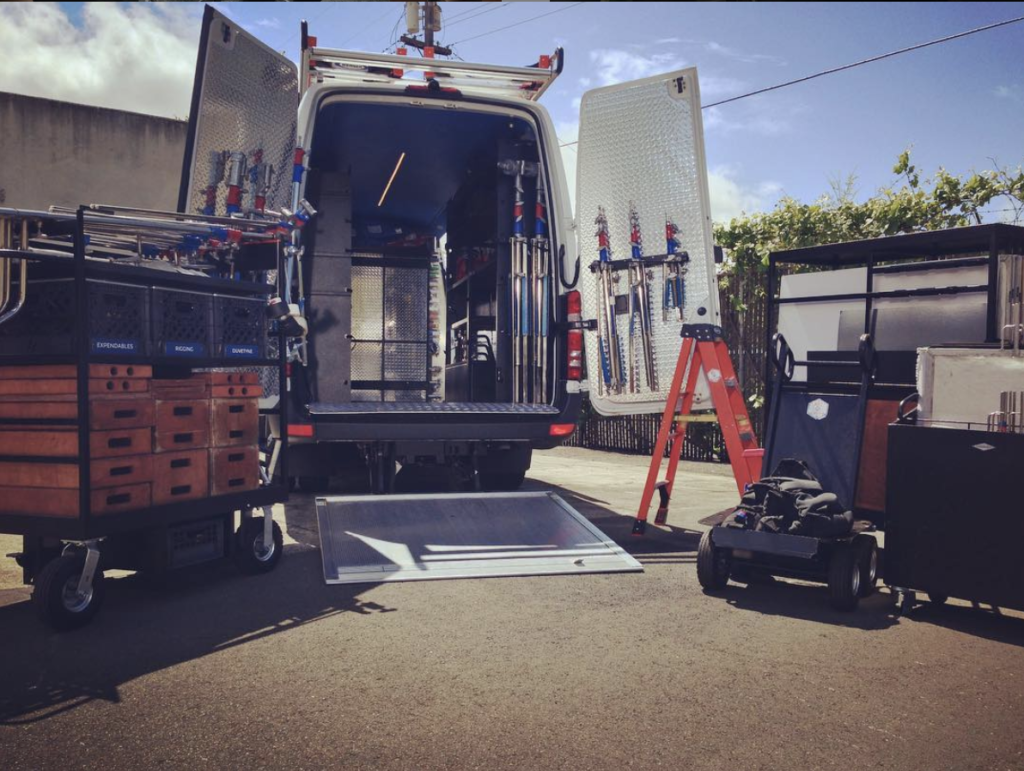
The 3500 is also the 170” Extended wheelbase Sprinter. We were finding that the most common and most affordable used sprinters on the market were the 2500’s with a 144” Wheelbase. The shorter the truck, the more payload you get as well. This is because the smaller vans all have the same gross weight rating, but because the van itself is lighter, you get more payload.
Even though the truck is a bit shorter, we felt like we could make things work. With a 1 ton package 70% of your gear comes on the 3 carts, duz-all, flag box, and muscle cart, so as long as you can get those carts on there with a lift gate, you’re in good shape.
The carts on both of these sprinters had some custom modifications done to them to accommodate the height of the van. Be sure before you buy that the cart works with your entire design, not just that it fits inside.
The Van!
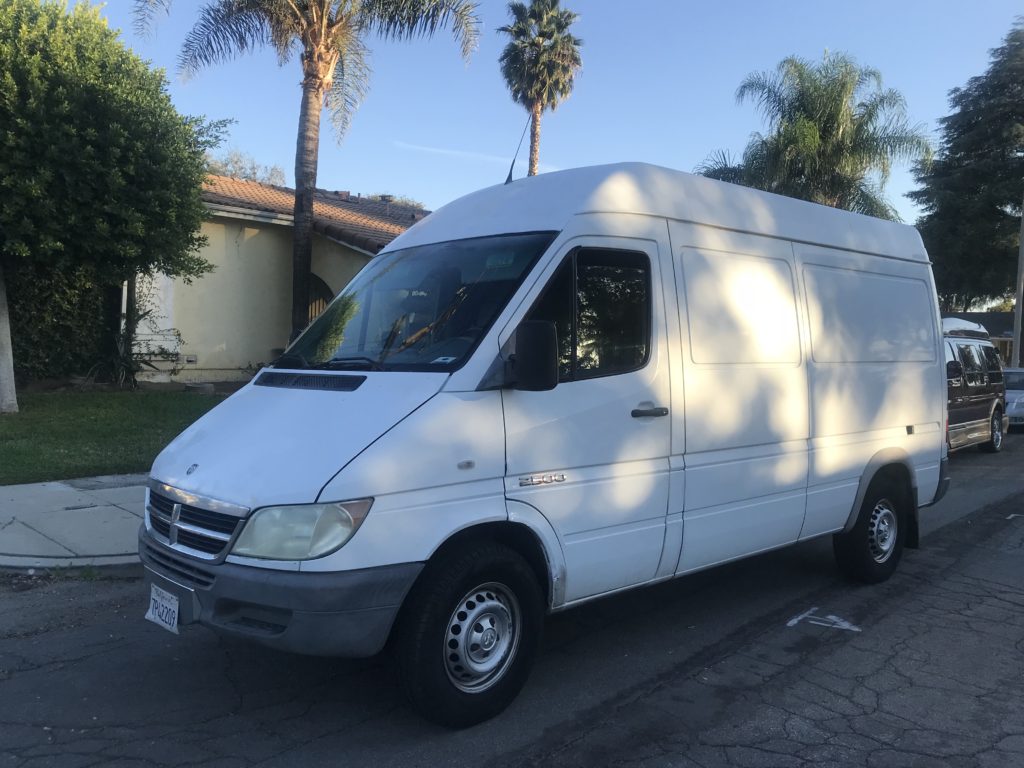
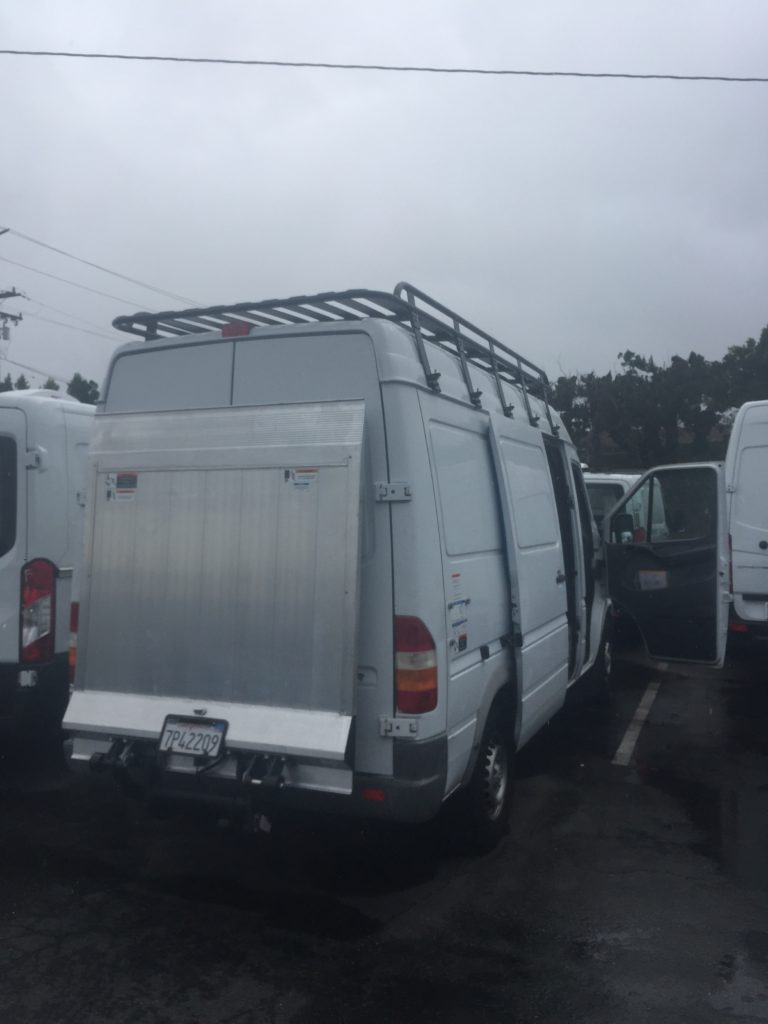
When we first bought the Sprinter it had a pretty interesting buildout, but wasn’t quite what we were looking for in a grip truck! We have very little idea what they used it for, but it had an old wheelchair lift gate on the back that had to go, and then it had this strange structure inside…
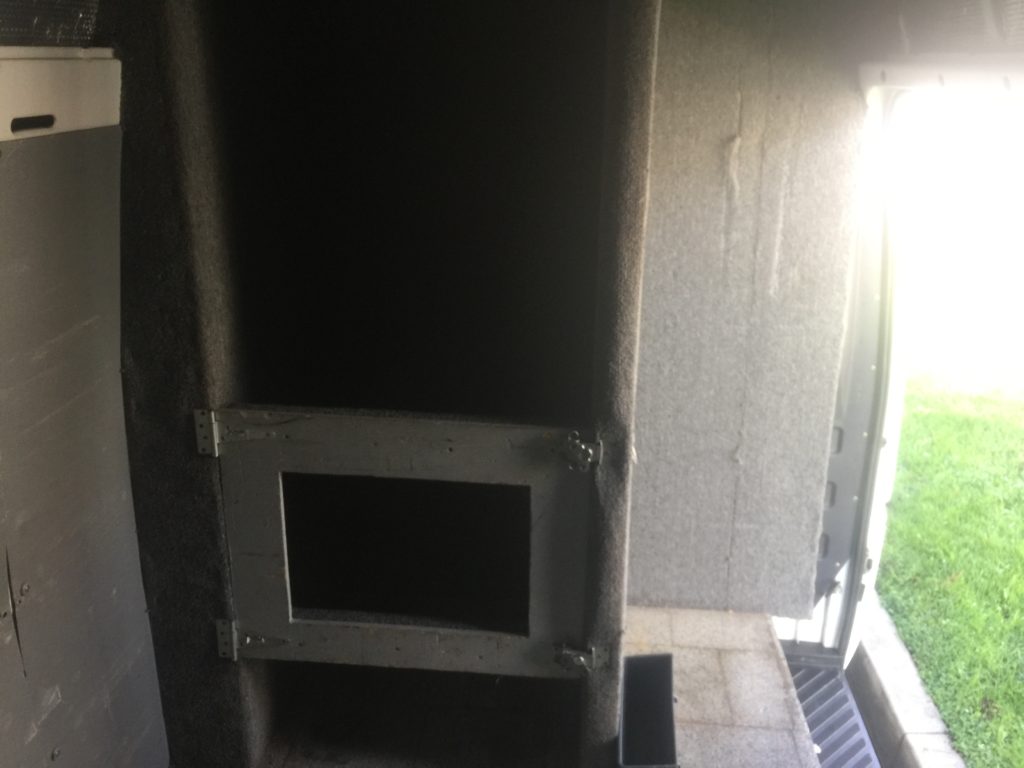
All that had to go…Demo Day!
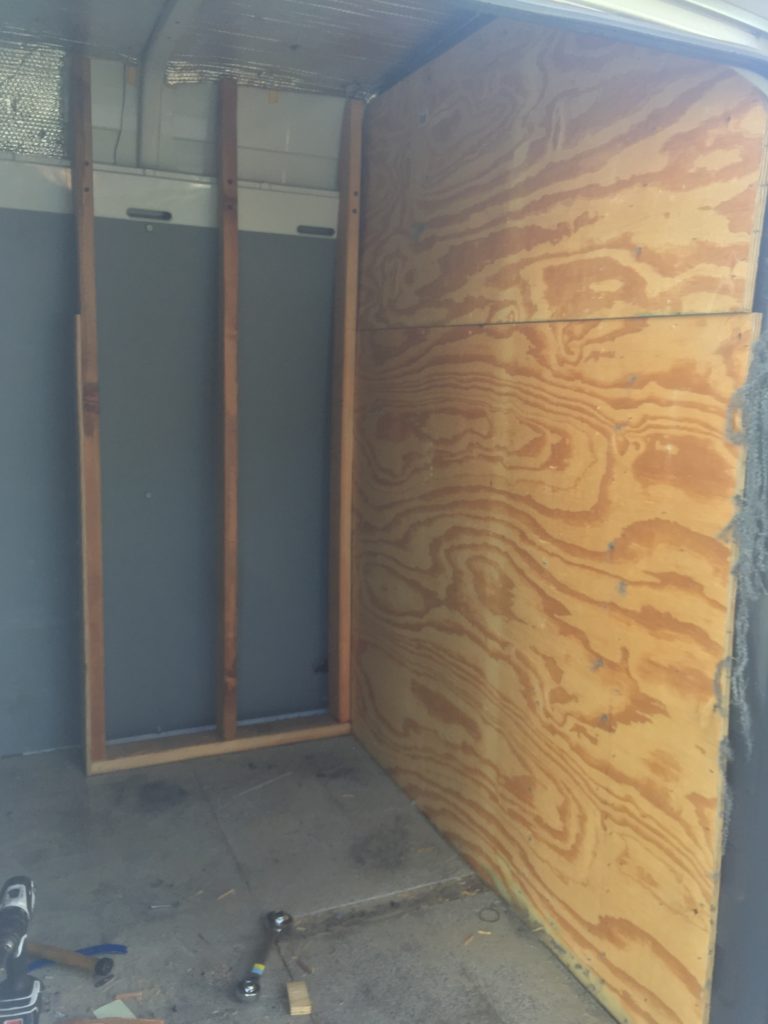
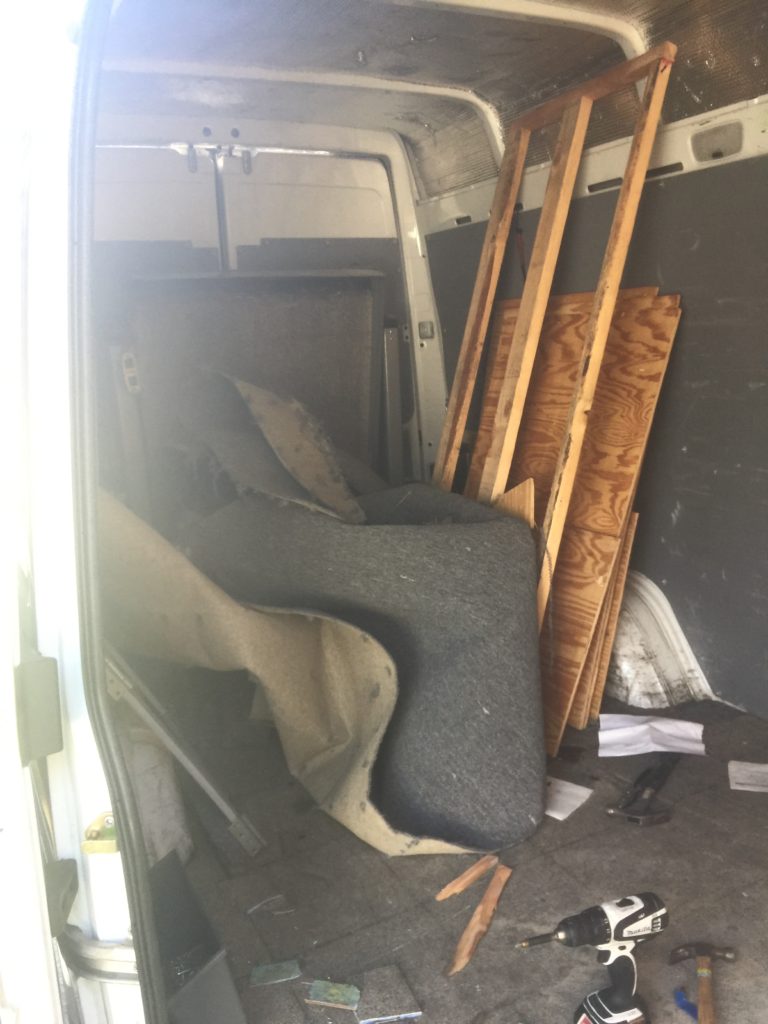
You can catch a glimpse of the wheelchair lift gate in this picture as it actually was installed INSIDE the truck. Also check out the flooring! A terrible linoleum glued to a 4×8 piece of sheet metal.
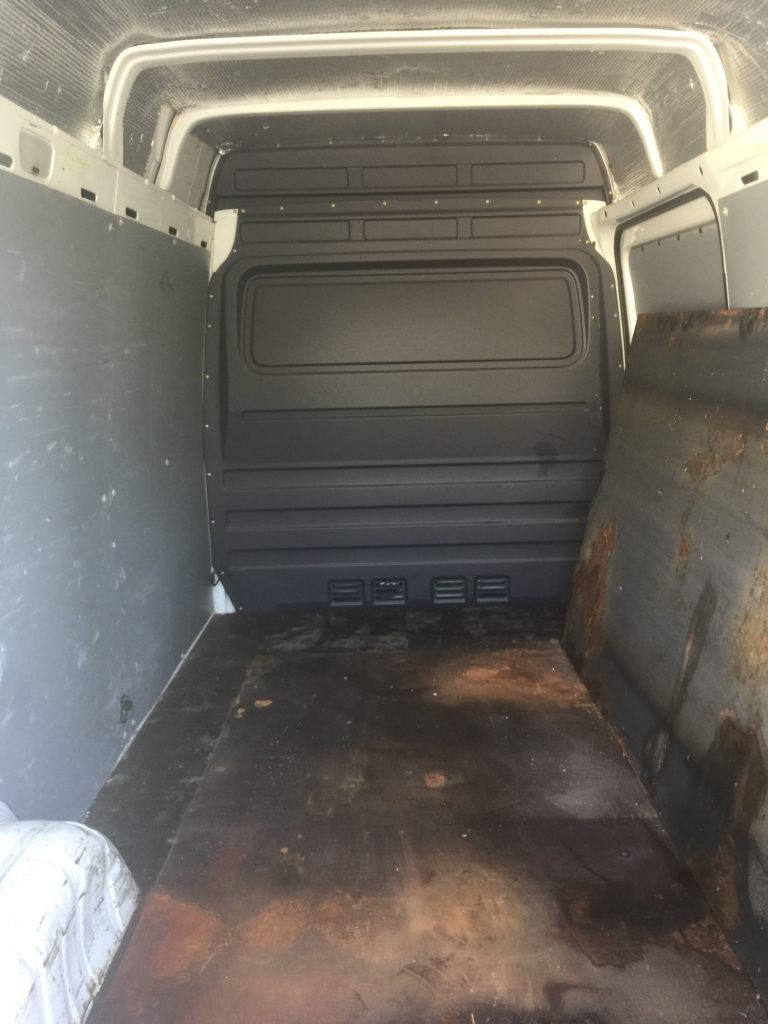
Upfitting
With everything out of the van now, we could start to think about upfitting. We took it to American Campershell they had done previous work on our other sprinter and had done a fantastic job. They installed:
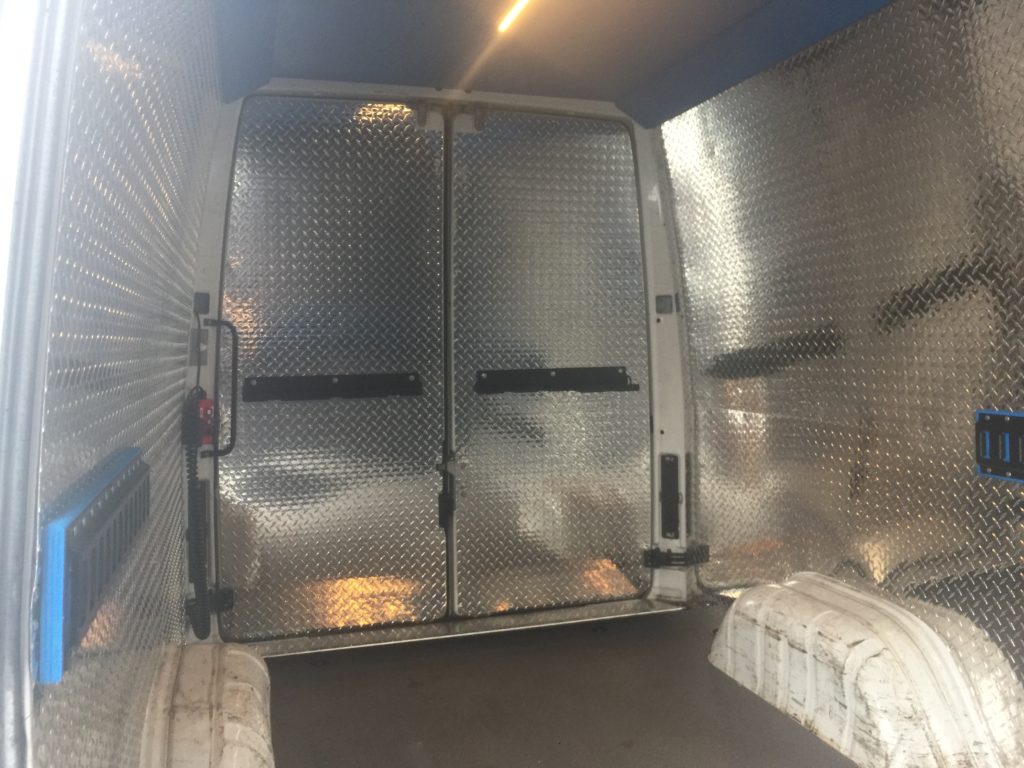
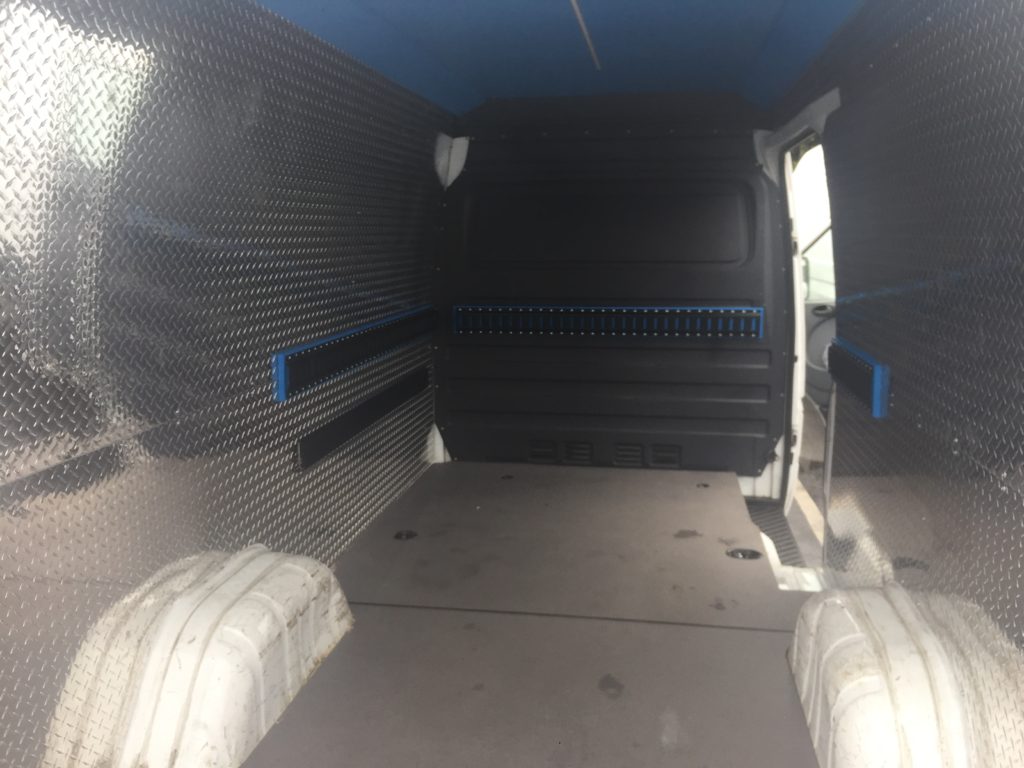
- Diamond Plating on all walls
- Blue Headliner with recessed LED lights and a timer switch. – We’ve found recessed LED lighting to be extremely important, as anything that sticks out will be destroyed by a combo stand or speedrail. It’s more expensive, but very worth it.
- Palfinger Mini Fix Liftgate with 3 Button Pickle
- Side door covered with 1/4” Ply and Painted Blue. – This is really a cost saving measure. Cheaper than the diamond plate and the side door isn’t really hit with any force from equipment.
- E-Track in key areas.
- New Flooring
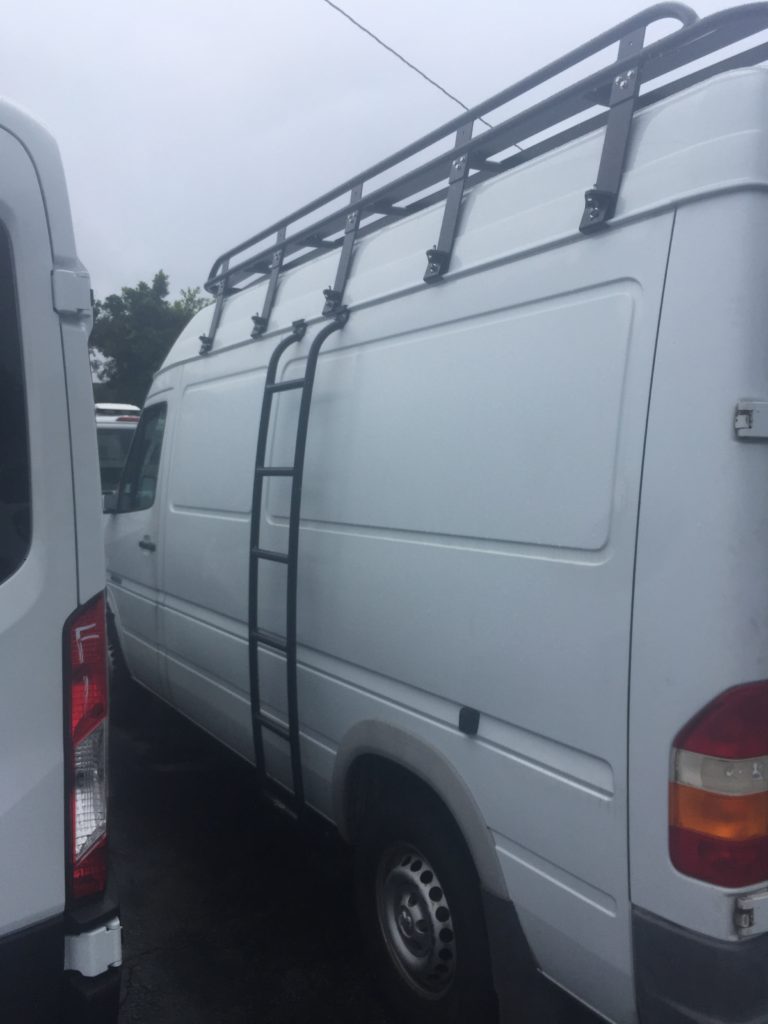
- Roof Rack for Ladders
- Side Ladder to Access Roof Rack
- Back up Camera with Monitor
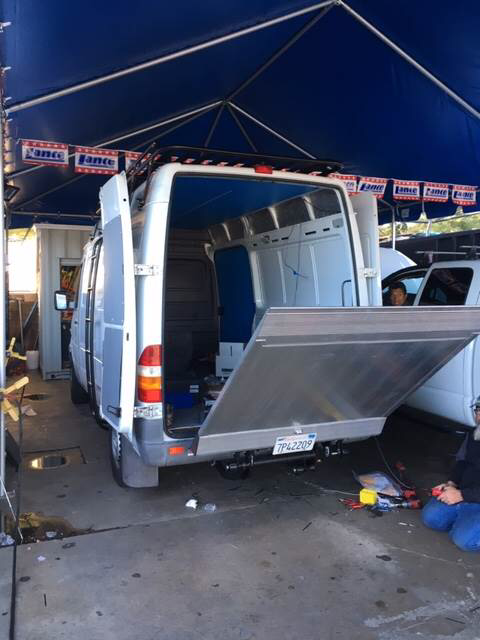
This was a long and costly process. It ended up costing about the same to do the upfittings than it cost to buy the van itself. Really makes the van feel like a million bucks though once you see it all finished

Shelving Design
Now that the Van is built out with the diamond plating, it was time to get started on the shelving. The vans are tough because they have wheel wells inside that keep you from just using carts, plus the curved walls! In order to use that vertical space you’re forced to build shelves over the top of the wheel wells.
We have had awesome success in the past using SketchUp as a way to build out shelving to scale. We use mostly 1”x1” square steel stock and a few other kinds of steel stock and plywood shelves to build out the inside. We have to say, is this the best way to build out a van or truck? Not sure. Is this what has worked for us…yep!
We knew that we wanted something similar to the other Sprinter, but that space would not accommodate the mini 4×4 cart. This meant we had to build a shelf to house some of the 4×4 goods and reflectors, plus another shelf that would house a bunch of milk crates, plus some other soft goods.
If you haven’t tried SketchUp before, it’s really an easy program to learn how to use. I figured it out just from YouTube and Lynda.com tutorials.
One of the hardest things to wrap our heads around was the slight curve of the sprinter side walls. It took some really meticulous measuring to come up with something that was accurate. Basically I decided on a few different heights and then measured across the van to get the total width at that specific height, then used those measurements to draw the walls. I also made sure to draw in the wheel wells and the small step on the side door.
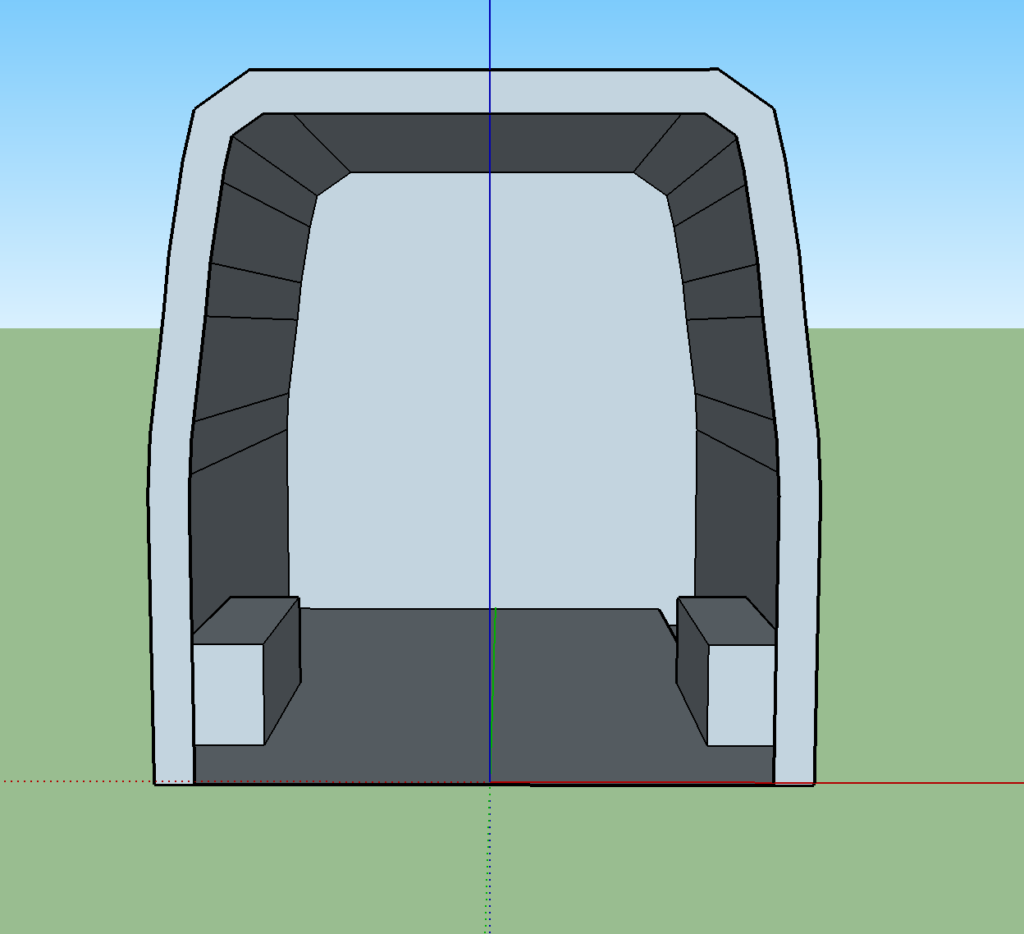
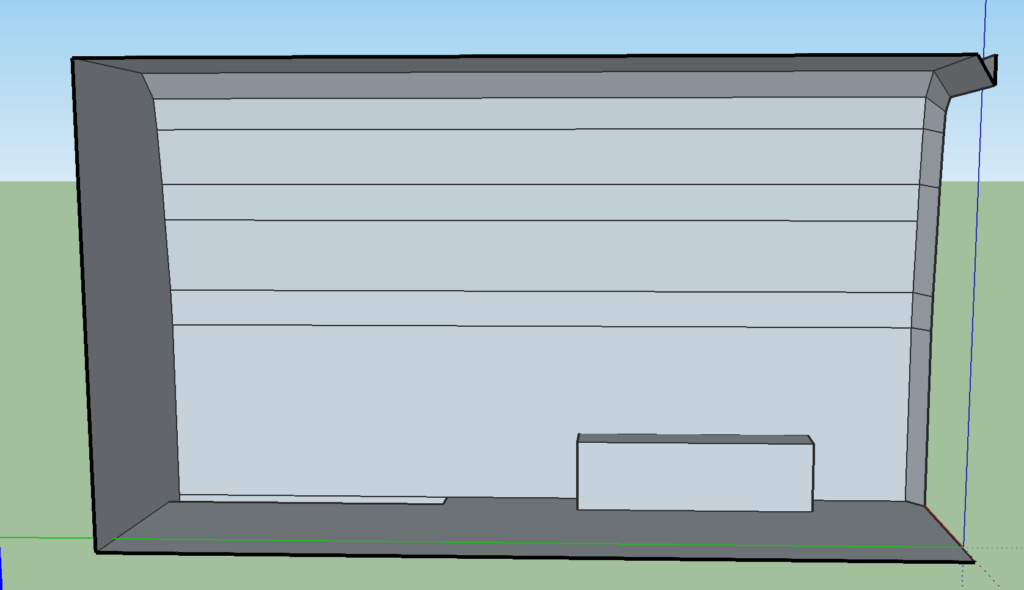
We decided to construct our shelves like the carts are built. Basically we have 1″x1″ square tube uprights and 1” angle iron crossbars. Then we cut a piece of 3/4” Plywood that fits into the two crossbars. It’s super easy to build, lightweight, and you can remove the shelves if need be to make other shelves taller.
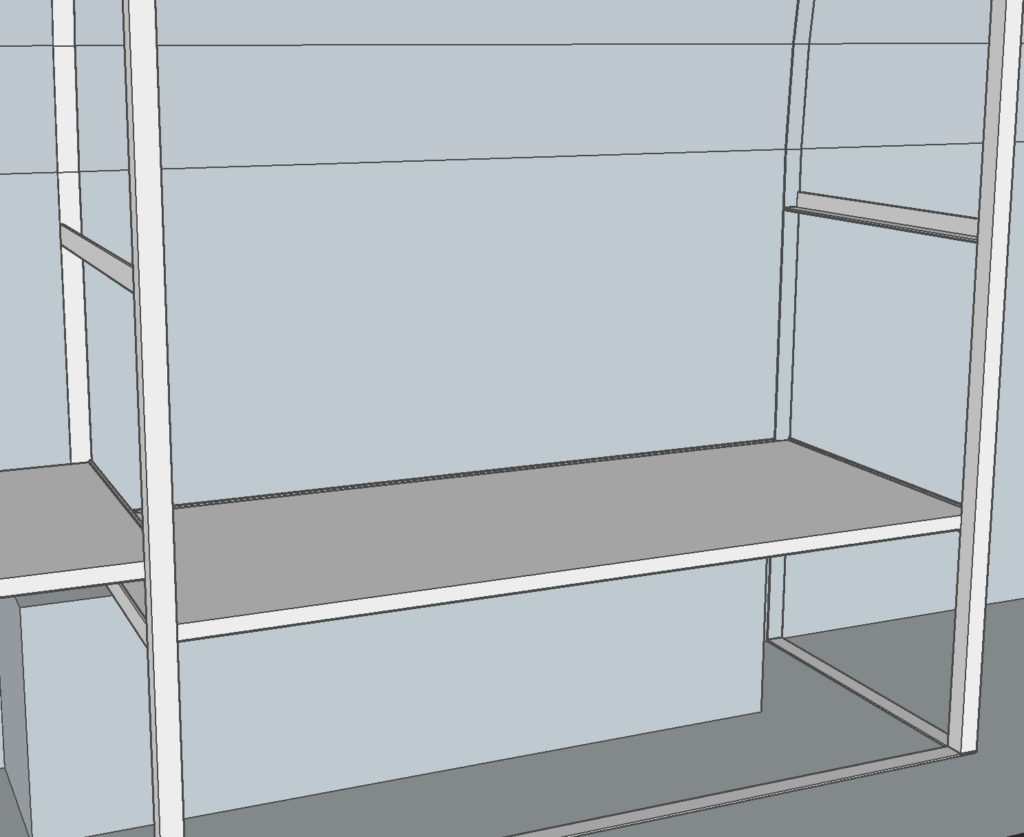
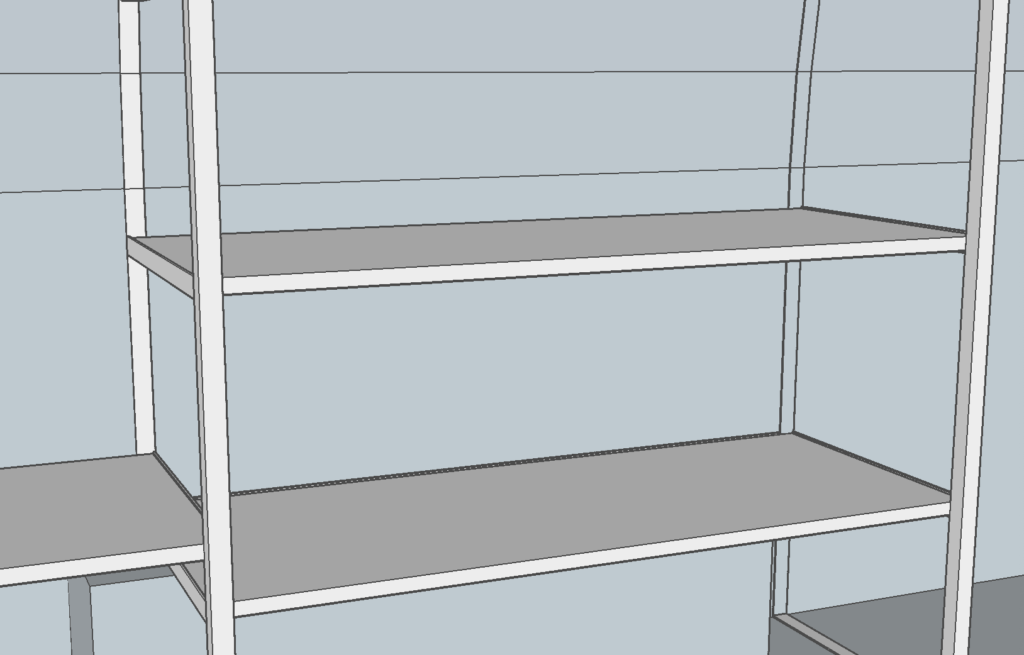
Getting started now on the left side shelf! I have to say, one of the mistakes I had made in previous designs of other trucks was not taking the time to group all of my items together. You can see the outliner on the right side in the below photo, this time I was very careful to group each set of faces and lines into the square tube piece that it belonged to. This made it so that when I inevitably had to shorten a shelf or change a dimension, I could select the proper piece of square tube and modify it quickly and easily.
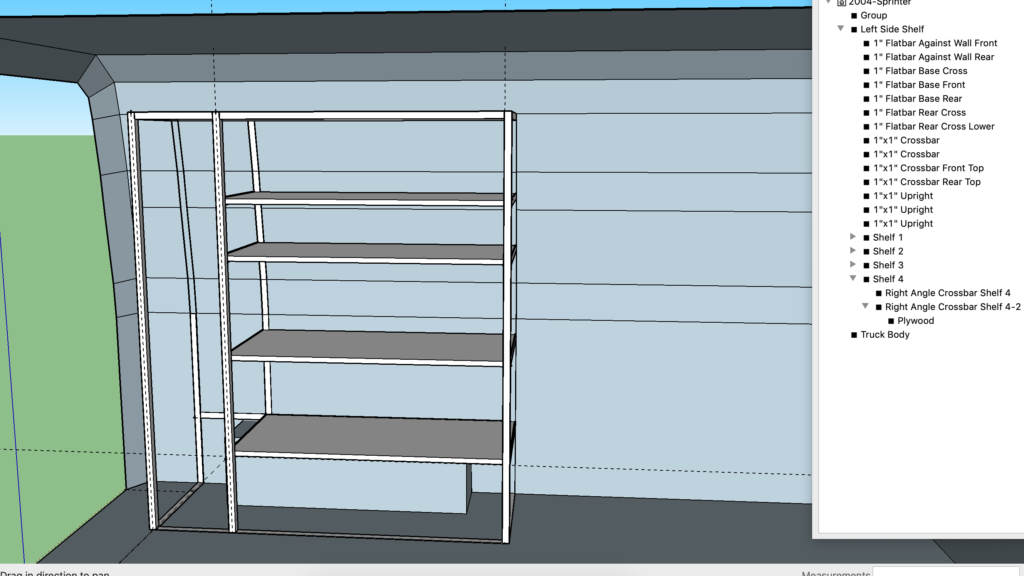
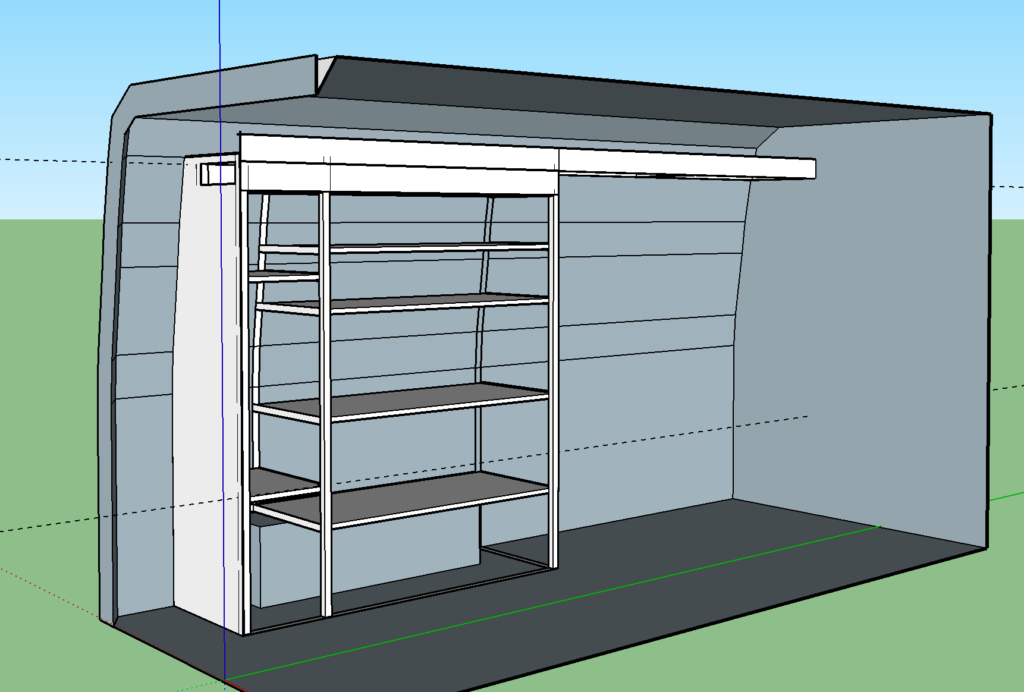
Finished up with the Left Side Shelf now. While it looks pretty simple, it took so much measuring to figure out that every dimension was going to be accurate. The idea was to do 4 Full Milkcrates on the right side of the shelf, 2 next to each other on each shelf. Then as we went up further, do 4 half milk crates, 2 next to each other on each shelf. The Mini Duz-All is going to fit underneath the shelf on the right side, similar to where it was in the previous picture.
Then we have these thin shelves on the left side that would house our 6×6 goods and ears and corners sets.
We have a 10’ long slot above for dolly track and speedrail.
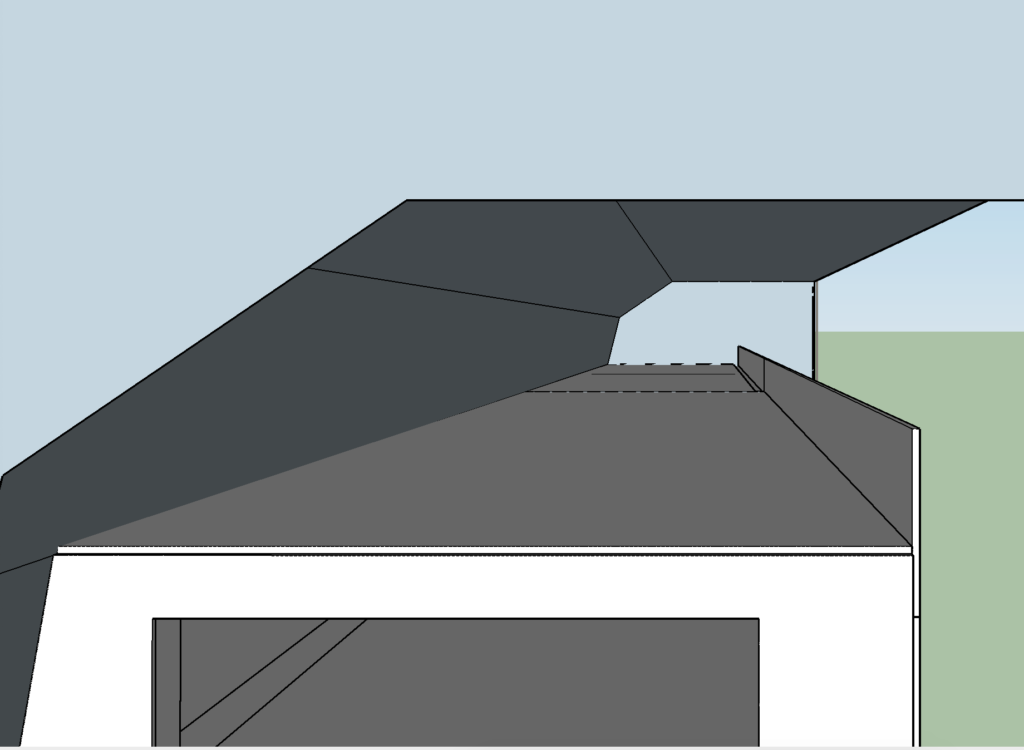
There is also a slot on the front of the shelf for 4’ long items like our Wind Sticks, 4’ Level, sledge hammer, broom, and others.
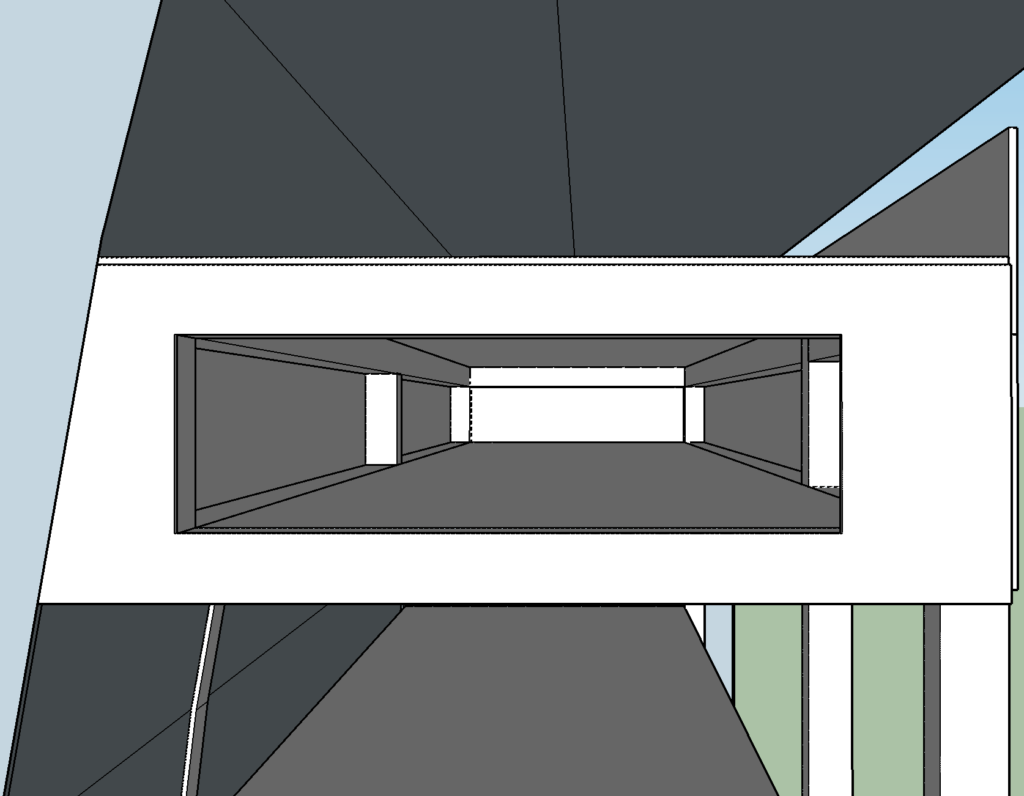
Each item was measured, and then shelves measured in SketchUp to make sure that it would fit on the desired shelf. Lucky for us our 1 ton package is pretty clear at this point, as it will be the same package as our box truck and our other Sprinter, so it’s just a matter of finding a place for everything.
Now onto the right side shelf.
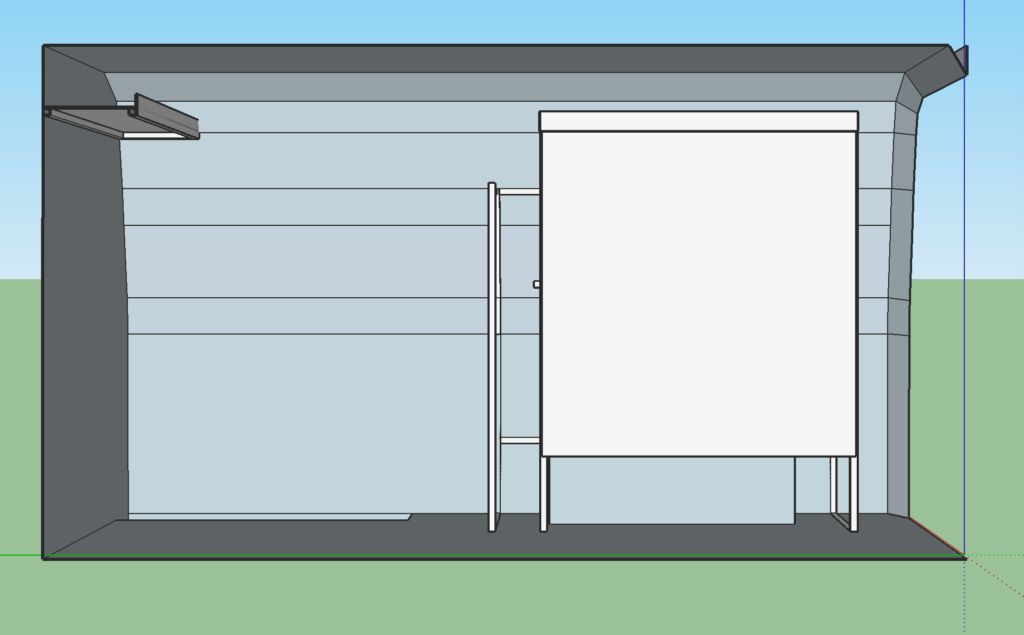
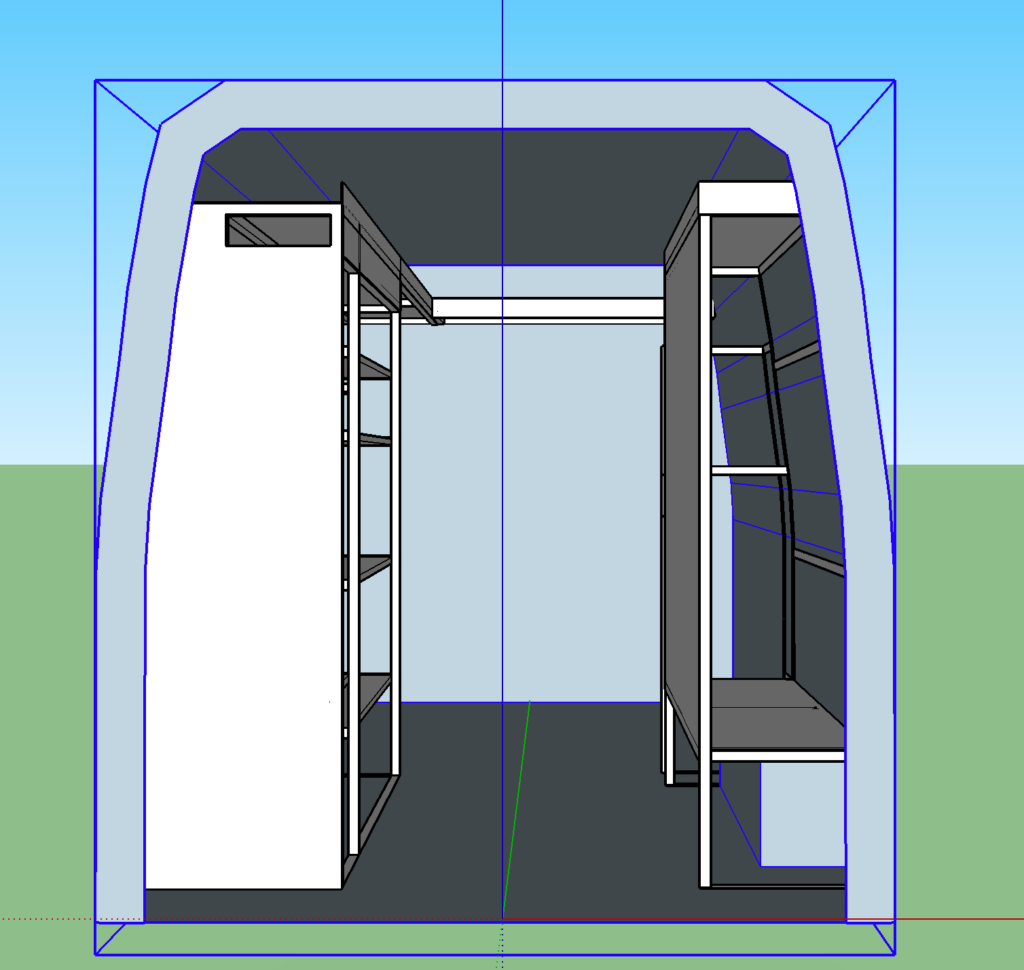
For the right side shelf we were fighting a lot of things here that ultimately ended up changing, but we needed to find a space for the following items, all 4’x4’:
- 4 Floppys
- 4 Open Frames
- 1 Beadboard
- 1 Ultra Bounce
- 1 3/4” Plywood
- 2 Reflector Boards
- 1 Single
- 1 Double
- 1 2×4 Floppy
So I started by measuring the width of all of these and made the shelf wide enough and tall enough to fit all of them, taking into account the lip of the vehicle. We also created a lip around the top to fit a small roll of visqueen and rubber matting as well. On the left of the shelf we had a rack for combo stands. Only one rack in this picture, but eventually it turned into two. Here’s a few other views:
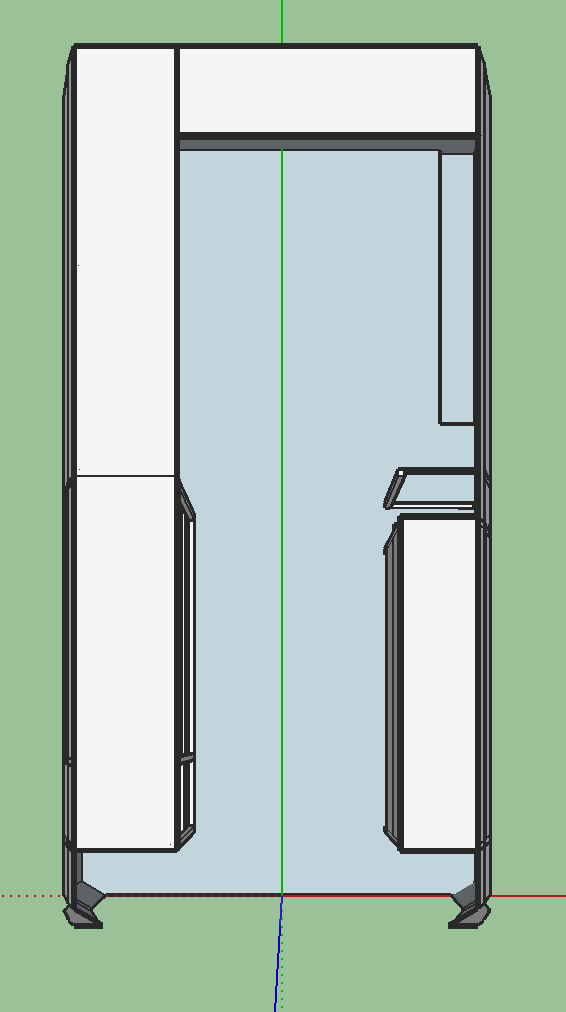
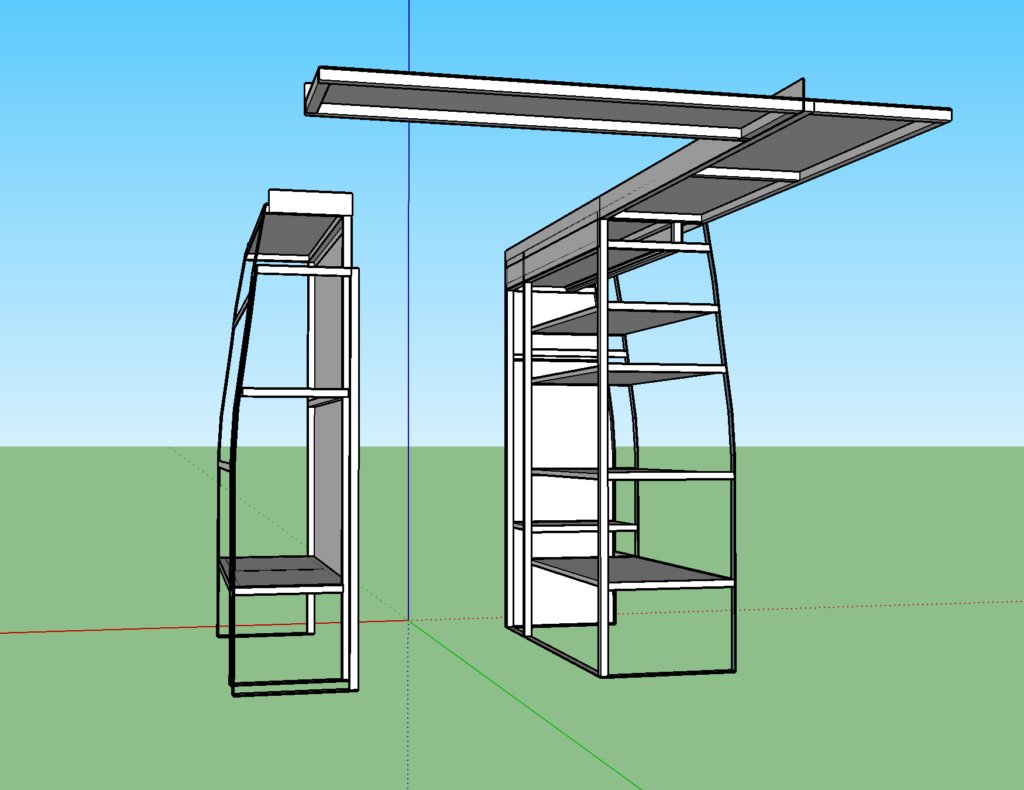
Honestly at this point the heavy lifting is done, but it’s far from over. Now we have to get into the nitty gritty of whether or not things will fit. You’ll notice in this picture there are pieces of blue paper tape all over the walls:
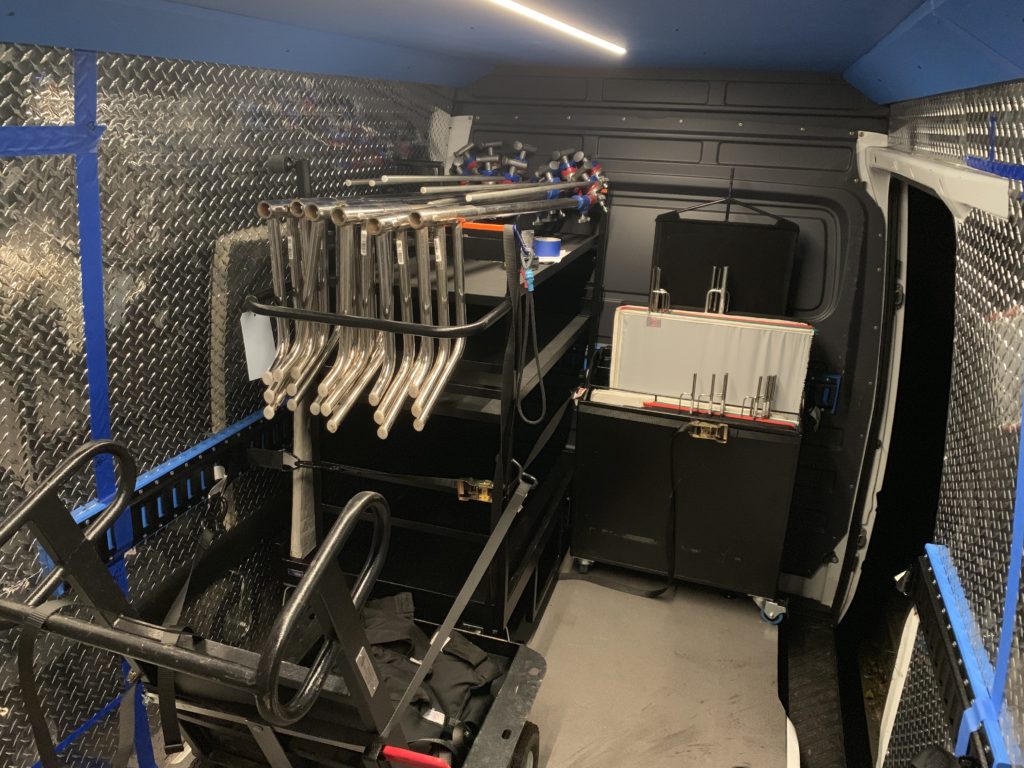
Once we finished building the shelves we took it to the real world and tried to tape out where the shelves would be and see if the carts would still fit. It’s great that we did that because we found the following things:
- Our intended space for 2 additional c-stands was not going to work.
- Combo Stand racks were an obstruction for the Mini-Duz all. Since the cart had to turn hard right so that you could nose-dive it into its space on the left of the van, the combo stand rack prevented it from going in there.
- The mini muscle cart measurements I had were incorrect and it would not fit with the current right side shelf.
- Had to develop a new space for all the combo stands.
We’ll start with the re-designed left side shelf.
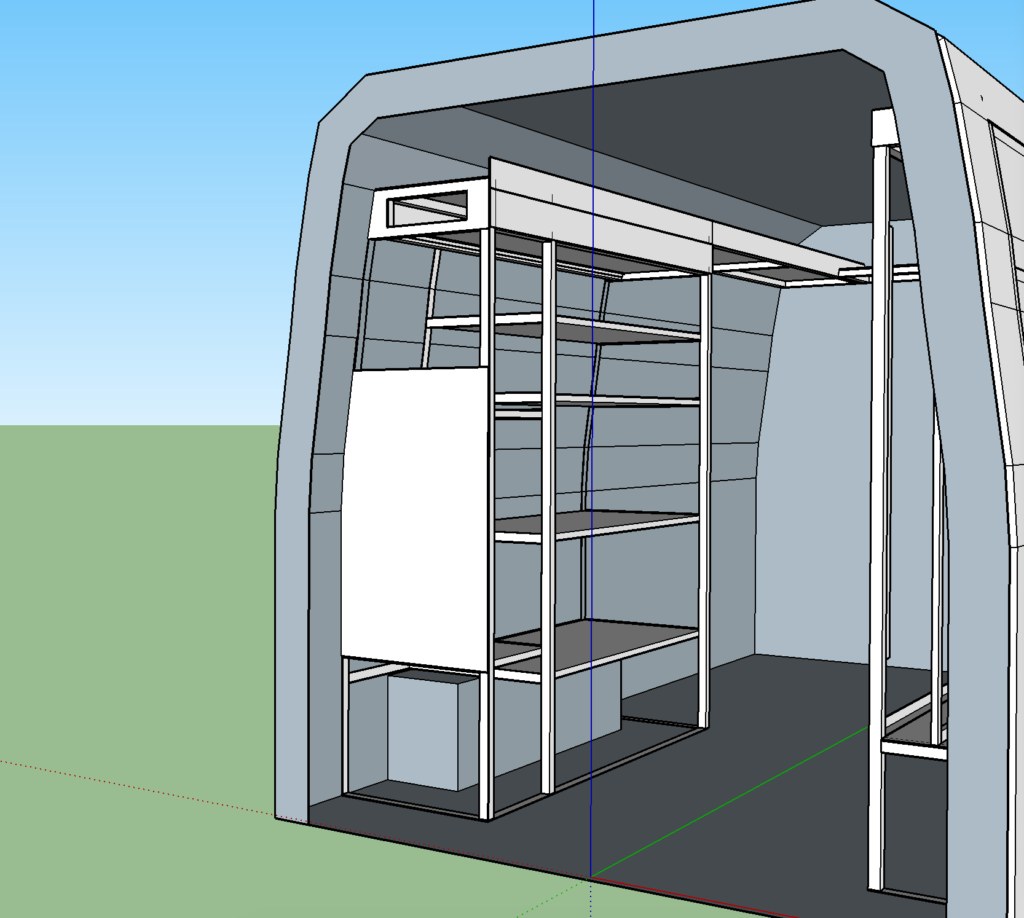
Really the main thing that happened with this shelf was reconfiguring the shelves on the left that would house the 6×6 goods since we wanted to hang a few c-stands on the face of this shelf.
That’s why we opened up the bottom and the top, so a c-stand could hang from it’s T-Handles and the legs could slide underneath. We are even contemplating not having any diamond plate there and finding another cheaper more lightweight way to keep the 6×6 goods from falling out.
The other mistake I made was measuring at the shelf level to see if the milk crates would fit with the curved wall.
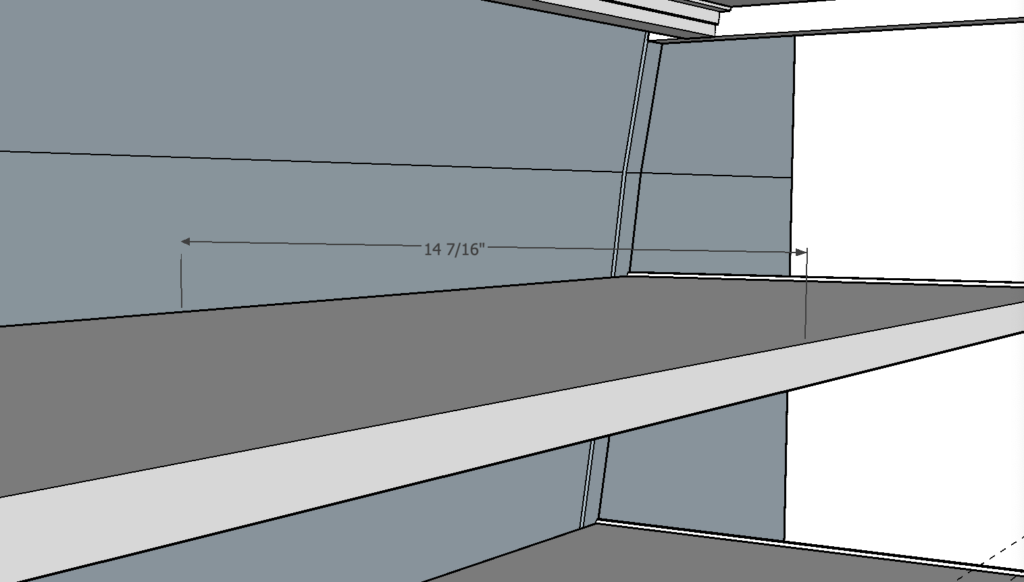
(Half Milkcrate is 13” wide, so these seems pretty luxurious. It almost seems like I should make the shelf shorter to gain more room in our aisle.)
The only thing is as you go up, the wall curves more, which means less space.
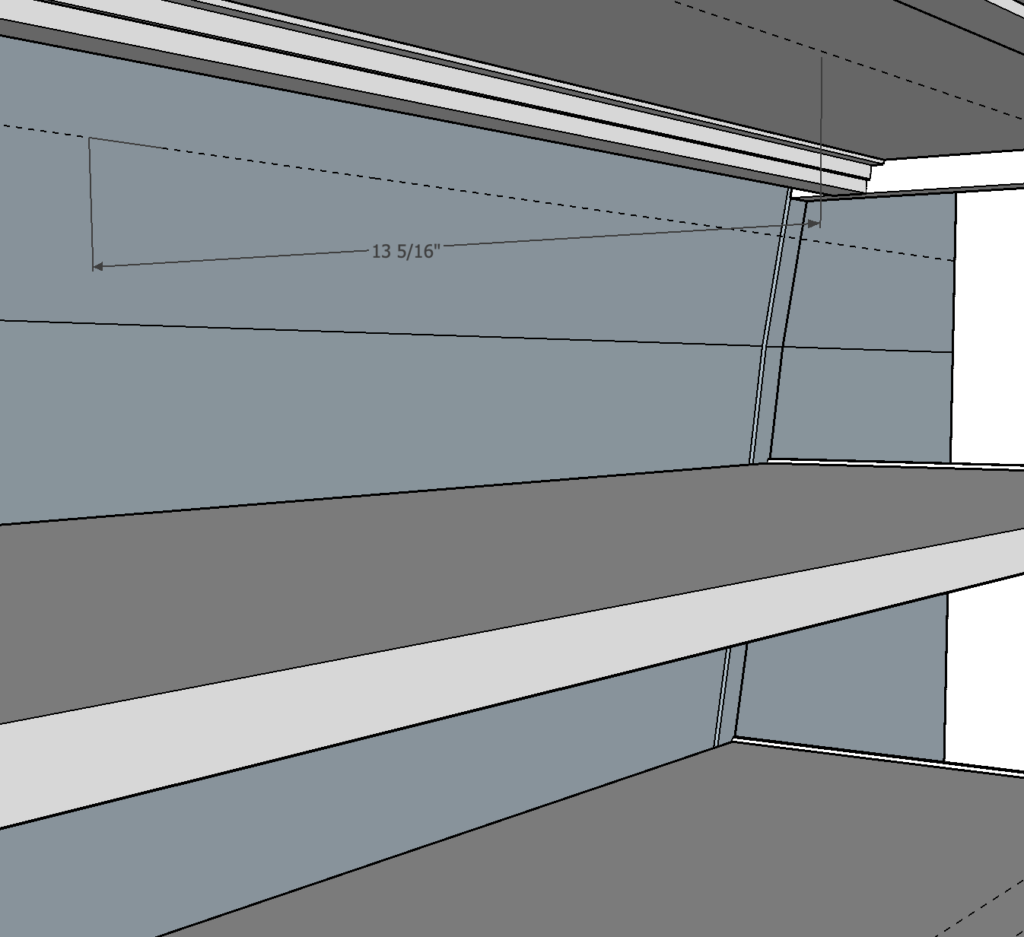
Now it’s actually perfect. Leaves 5/16” wiggle room for the crate to be inset.
Before I didn’t realize this, so in this new design I had extended the shelf by 1 – 5/16”.
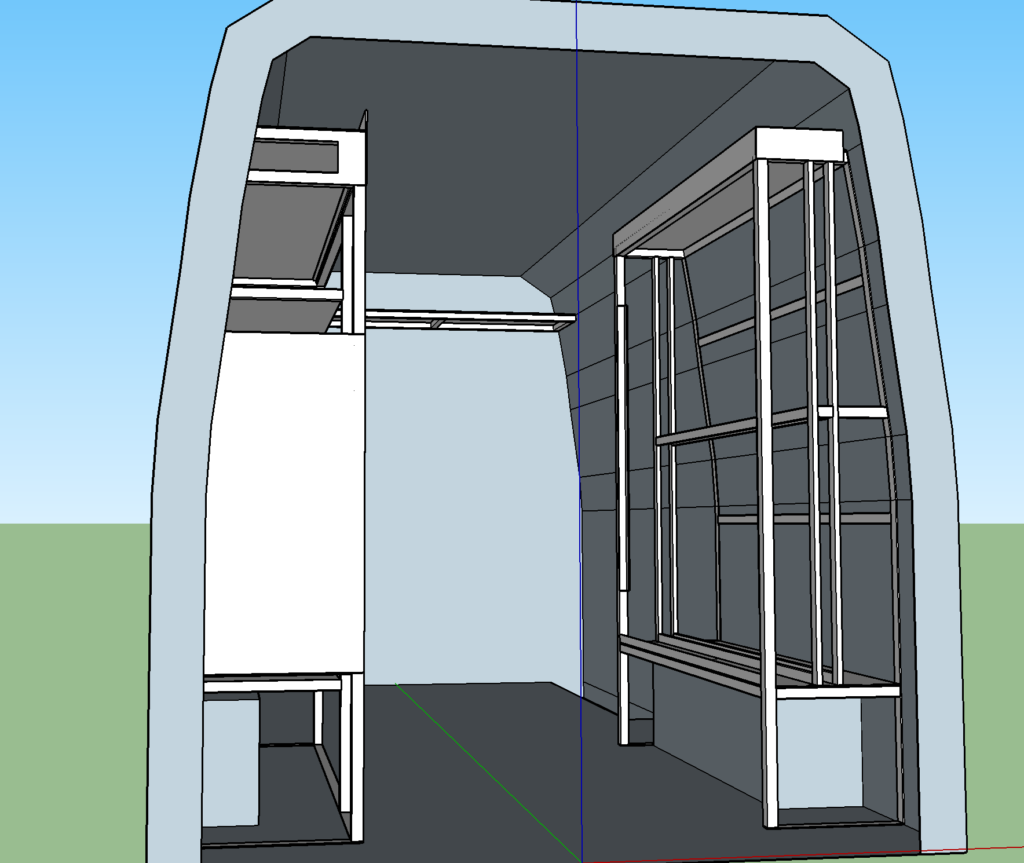
Now here’s the right side shelf. Notice how much slimmer it is than before and the additional dividers for the reflector boards. Here are the things we realized.
- If you pulled the reflector boards out from the side door, you didn’t have to worry about the lip getting in the way. This would allow you to use much more of space that was right up against the wall.
- We could remove all cross bars from the 4×4 flag area and just use rope ratchets to act as a stopper. This way it allows you to pull the 4×4 items out from both the lift gate side and the side door.
- We decided to only put the essential 4×4 things here, the rest would go on the back of the duz-all as that made our aisle workable.
- Decided to put the 2×4 Floppy in with the reflector boards. Look at how much room is there for the first reflector board spot because of the curve of the van. The 2×4 Floppy would go perfect here.
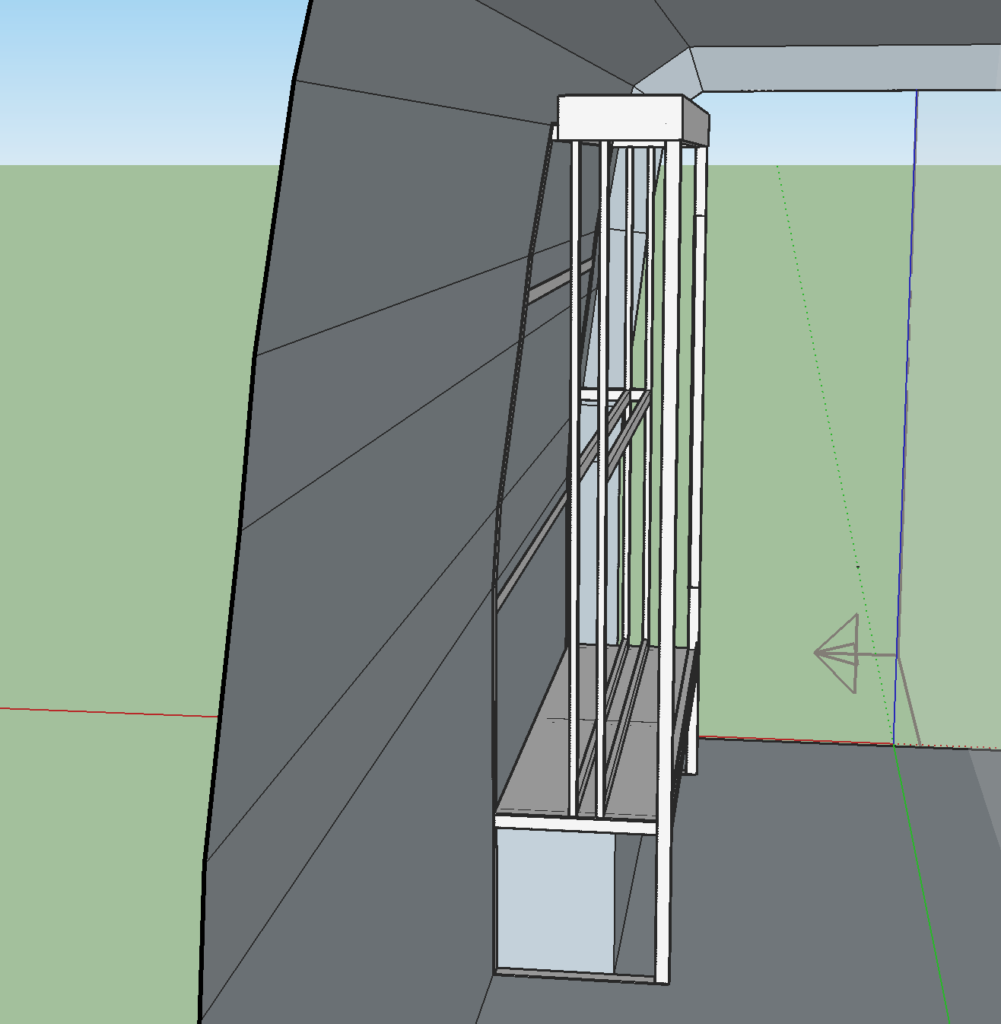
- This ones a bit crazy, but we decided to inset the 3/4” plywood inside the front of the frame. We always like having the plywood on the truck as it acts as a great cart ramp, but we know it’s seldom used. We remove the diamond plate face on the right side shelf and instead placed pieces of 1” angle iron on 3 sides.
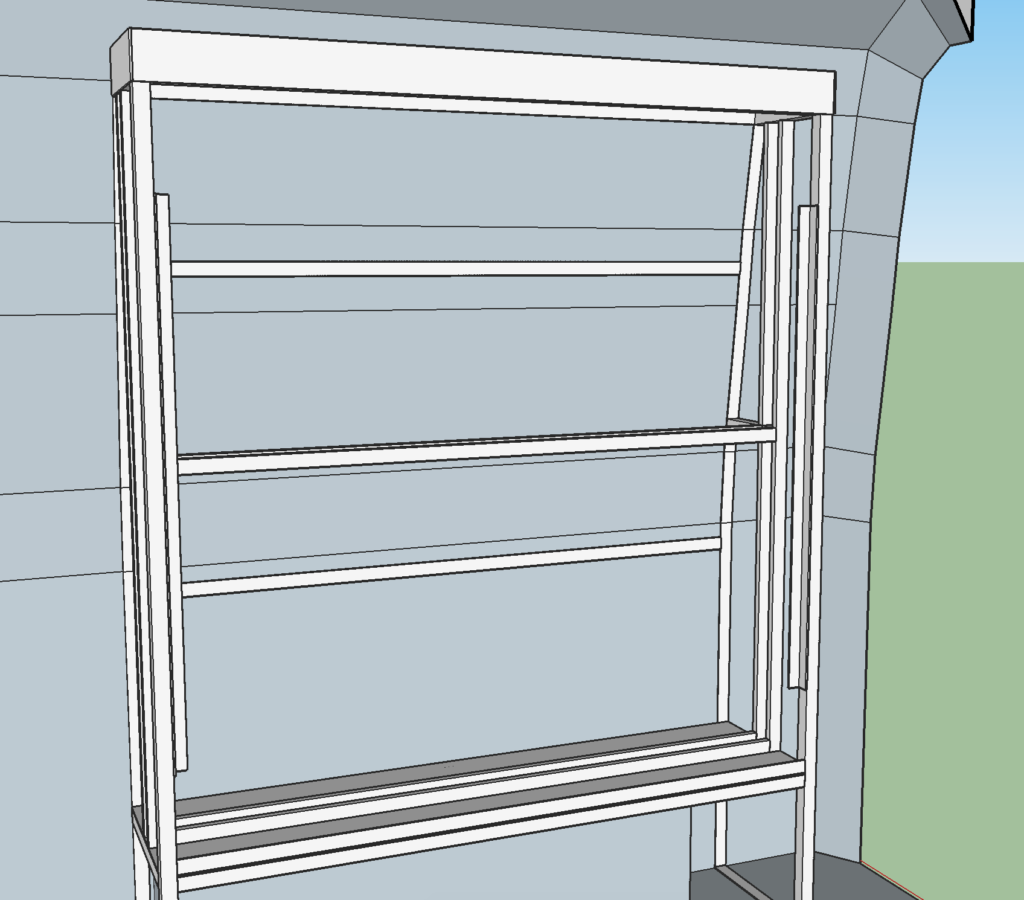
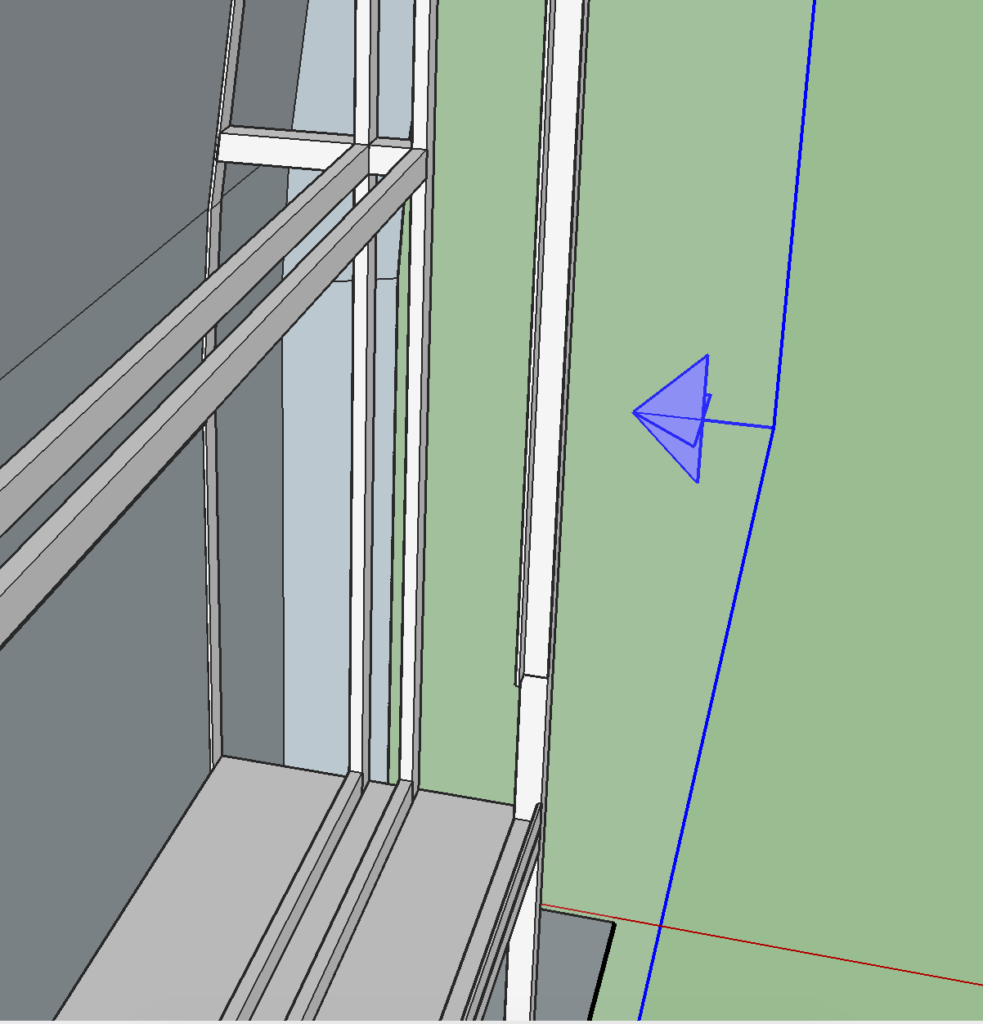
This would allow a piece of 3/4” Plywood to slip in-between the previously unused space that was inbetween the square tube frame and allow the whole shelf to be 3/4” thinner. We also plan to make some kind of latch to go at the top, but we’ll leave that to our welder to figure out.
I know 3/4” doesn’t sound like that much, but when you’re building out a van every small measurement really counts, not to mention every pound counts.
The final thing I did was just to create these objects that would represent items that would go in the truck. Milkcrates and various carts. This helps as an additional reality check for you.
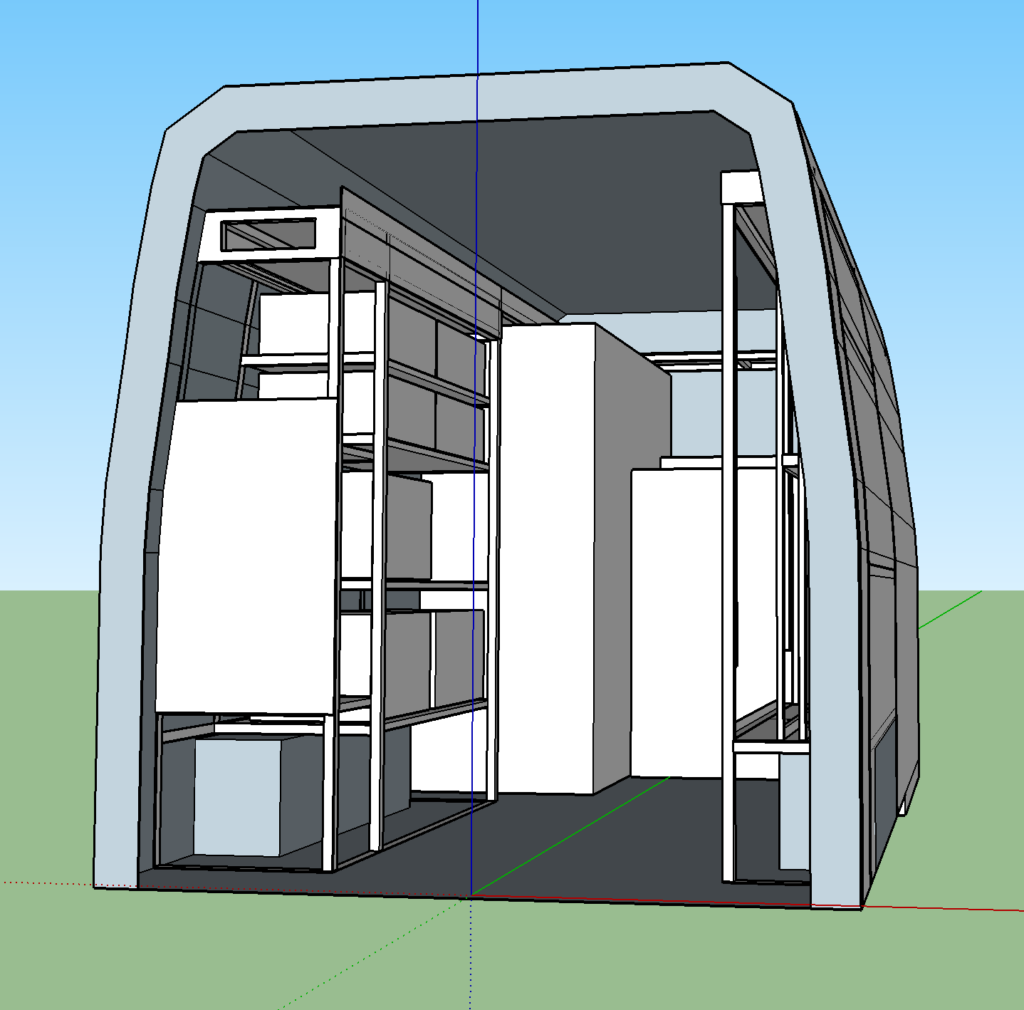
Well, that’s where we are at now! Keep an eye out for our 2nd blog post on this subject, actually building and installing the shelving. Soon we’ll have a finished van. Hope you enjoyed it.
Bolt Lighting Rental Inc is a lighting rental house located in the San Francisco Bay Area. We’re committed to training the next generation of technicians everywhere. Check out our instagram for daily educational content.
